Creating Your First App
This part aims to guide you through the initial steps of showing a dashboard on your web page/application for the first time.
Steps
- Creating the Project
- Installing Analytics SDK
- Working on Server configuration
- Embedding Analytics in your Client Application
- Using Analytics Fonts
- Styling the Client Application
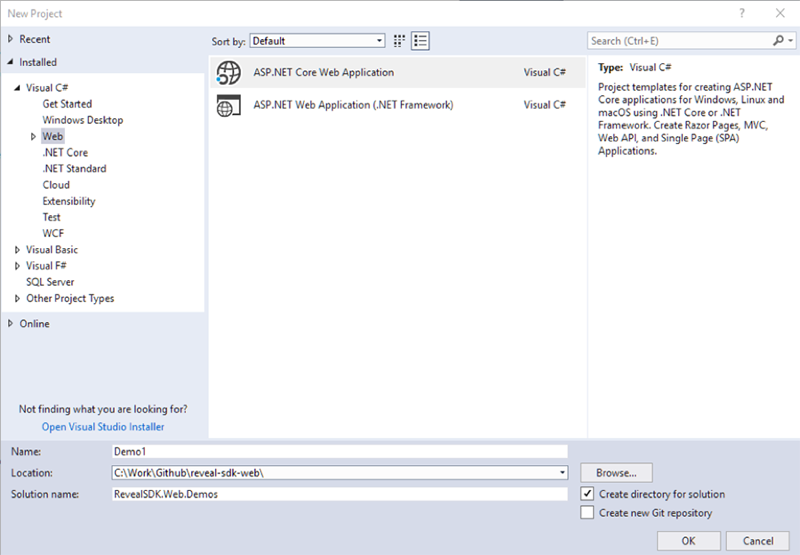
Step 1 - Create the Project
Open Visual Studio 2017 and create new project of type ASP.NET Core Web Application:
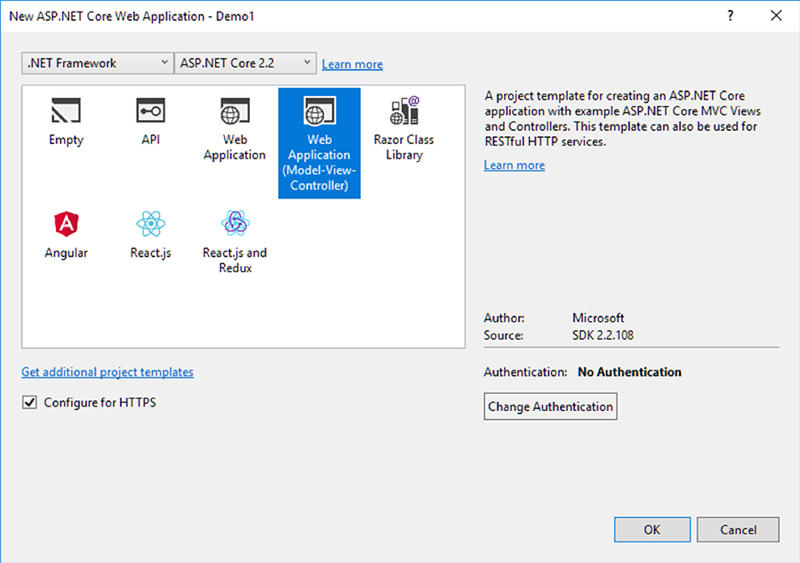
Select .NET Framework and ASP.NET Core 2.2 as follows:
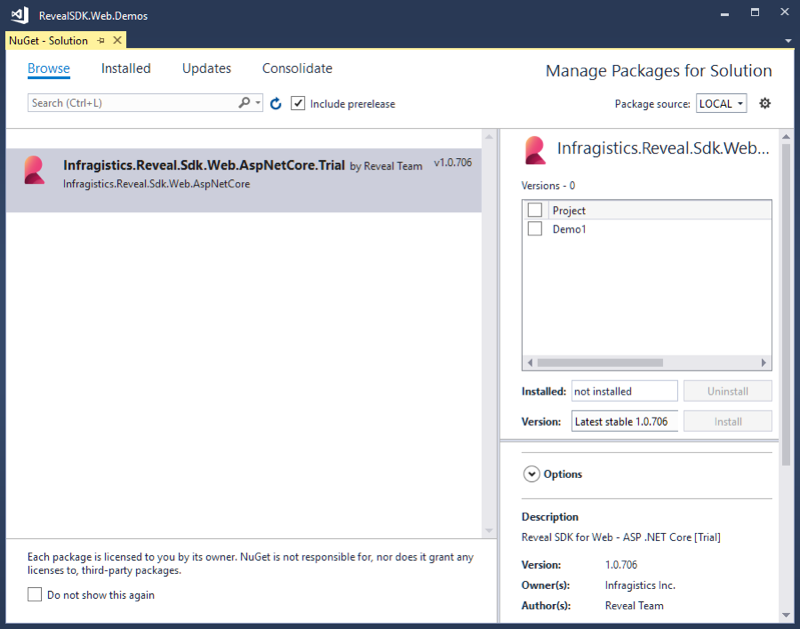
Step 2 - Install Analytics SDK
Download the Infragistics Analytics SDK from https://www.revealbi.io/ and install it on your machine. In Visual Studio go to Tools > Options > Nuget Package Manager > Package Sources. Add a new source pointing to the Nuget folder of the installed SDK:

After that you can install the Nuget by changing the package source to the one you added:

Step 3 - Work on Server Configuration
Create a new Analytics SDK folder in the project and add the AnalyticsSdkContext.cs class, which implements the AnalyticsSdkContextBase abstract class:
    using Analytics.Sdk;
    using System;
    using System.IO;
    using System.Reflection;
    using System.Threading.Tasks;

    namespace Demo1.AnalyticsSDK
    {
        public class AnalyticsSdkContext : AnalyticsSdkContextBase
        {
            public override IRVDataSourceProvider DataSourceProvider => null;

            public override IRVDataProvider DataProvider => null;

            public override IRVAuthenticationProvider AuthenticationProvider => null;

            public override Task<Dashboard> GetDashboardAsync(string dashboardId)
            {
                var dashboardFileName = dashboardId +".rdash";
                var resourceName = $"Demo1.Dashboards.{dashboardFileName}";
                var assembly = Assembly.GetExecutingAssembly();
                return Task.FromResult(new Dashboard(assembly.GetManifestResourceStream(resourceName)));
            }

            public override Task SaveDashboardAsync(string userId, string dashboardId, Dashboard dashboard)
            {
                return Task.CompletedTask;
            }

        }
    }
In the code above Demo1.Dashboards indicates the location where the dashboard files will be contained, so let’s create a new Dashboards folder in the project and leave it empty for now.
To do this, add the following code to ConfigureServices method in Startup.cs:
   services.AddAnalyticsServices(new AnalyticsEmbedSettings
    {
        CachePath = @"C:\Temp"
    }, new AnalyticsSdkContext());

    services.AddMvc().AddAnalytics();
And the necessary references in the same file:
    using Demo1.AnalyticsSDK;
    using Analytics.Sdk;
If you experience any issues, please refer to the Setup and Configuration (Web) topic.
Step 4 - Embed Analytics in your Client application
Let’s start this step by getting a dashboard ready. For the purpose of this demo, you can use the Marketing dashboard from the Samples section in Analytics, but with a different theme.
Open the Analytics app (https://app.revealbi.io) and go to the Samples.
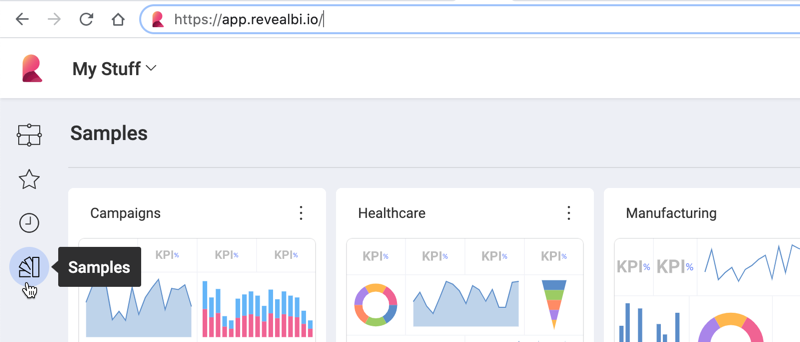
Select the Marketing dashboard and enter edit mode:
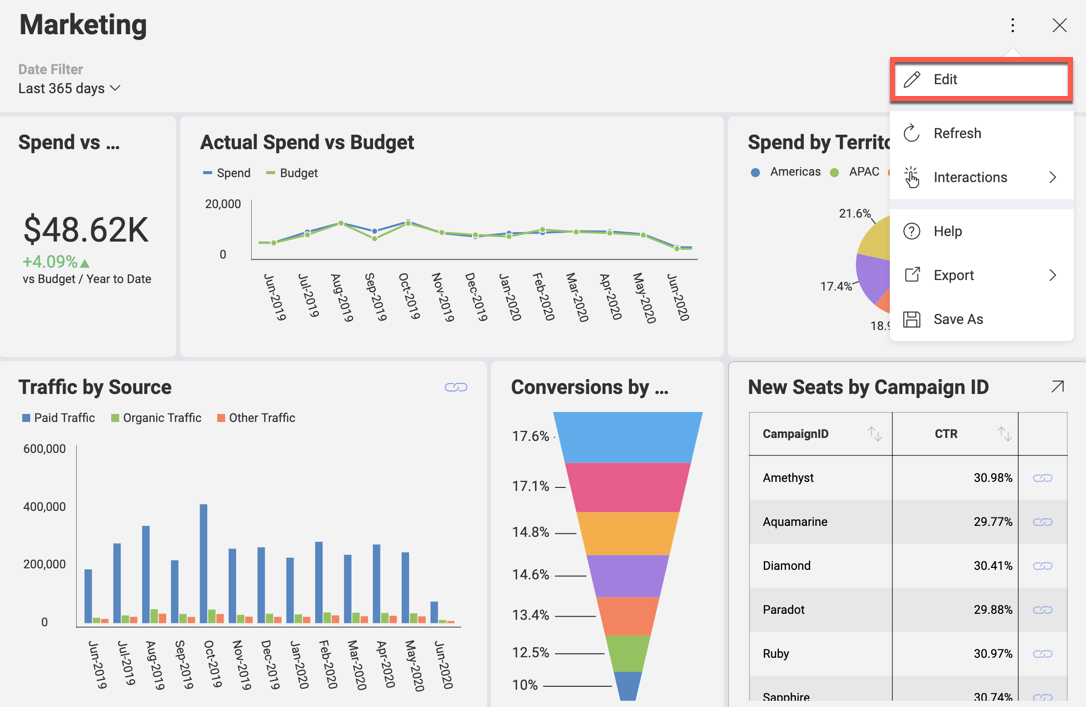
Once in Edit mode click the Theme button:
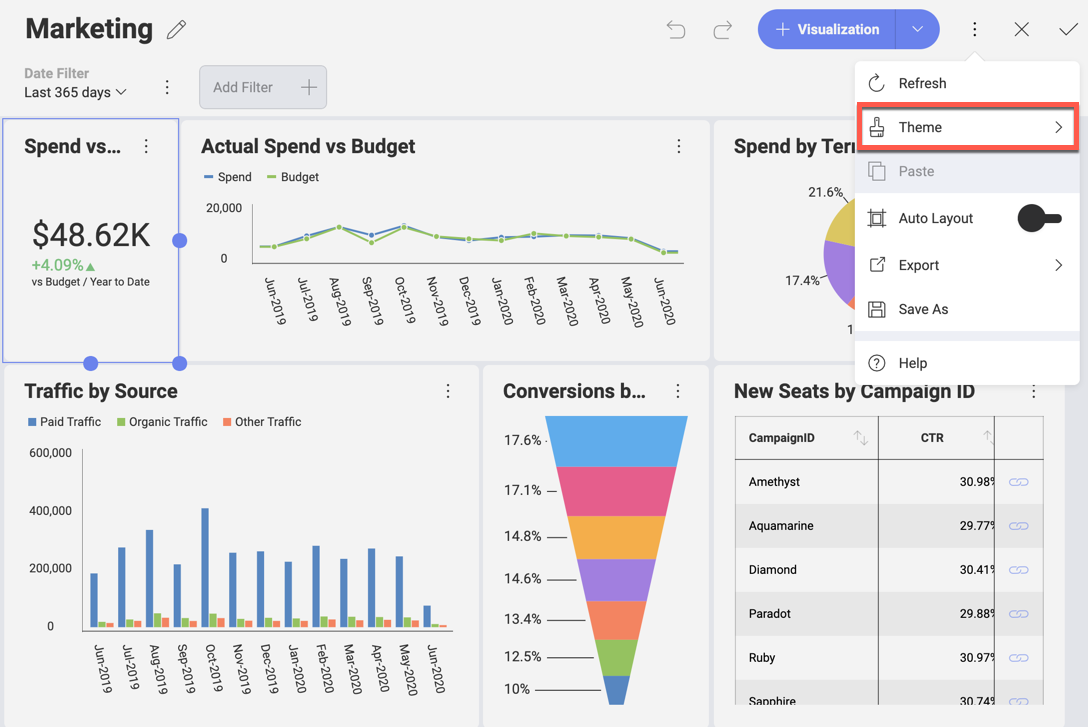
And choose the Ocean Theme:

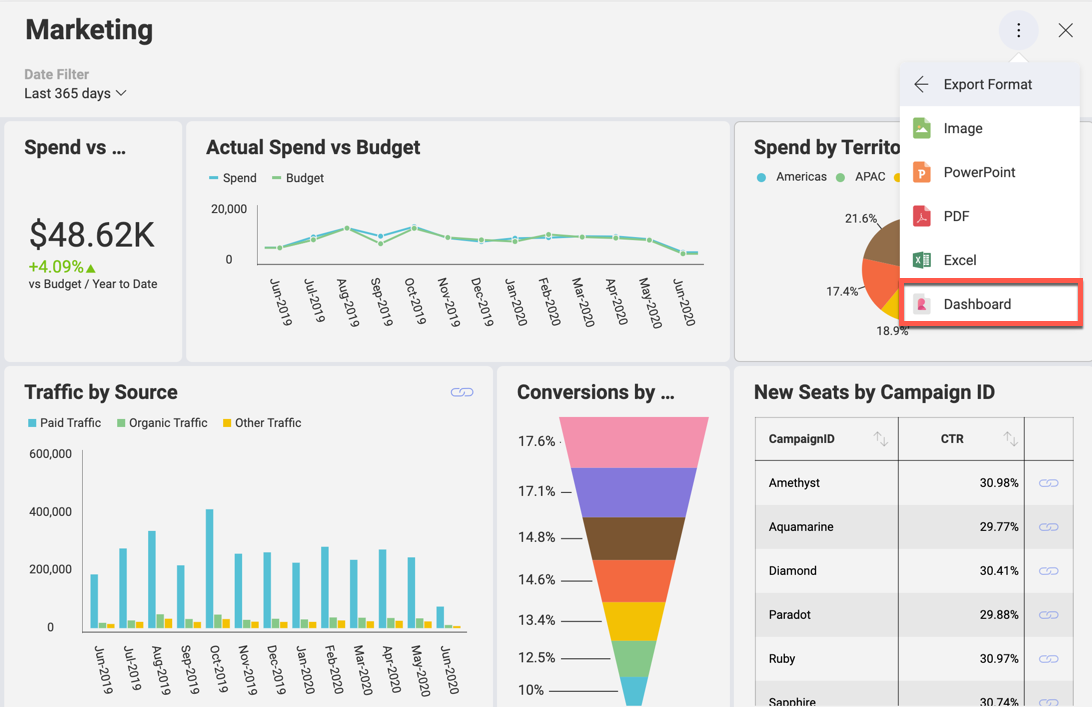
Save the modified dashboard and Export it:
Note
As the Marketing dashboard is part of the Analytics App Samples, you cannot save it the same way as a regular dashboard. Instead, you need to use Save As and choose a location.
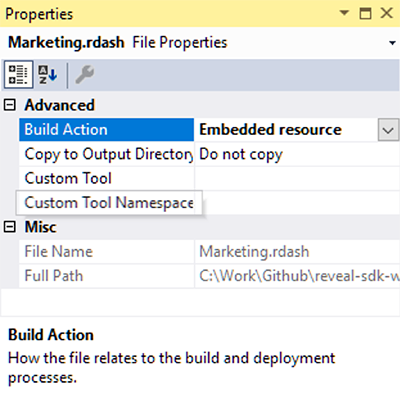
Move the Marketing.rdash dashboard file to the Dashboards folder, which you created in step 3, and set the Build Action for this item to Embedded resource in Visual Studio:
Now let’s add a new page Marketing.cshtml to the Views folder in order to visualize the downloaded dashboard:
   @{
        ViewData["Title"] = "Marketing";
    }

    @section Scripts
        {
        <script type="text/javascript">
            // Load dashboard in #revealView element
        </script>
    }

    <section>
        <div id="revealView" style="height:800px;"></div>
    </section>
Then, add a new action method in HomeController.cs:
   public IActionResult Marketing()
    {
        return View();
    }
Let’s add some references to scripts & css files for some third party dependencies of Analytics in _Layout.cshtml :
   <script src="https://unpkg.com/dayjs"></script>
   <link rel="stylesheet" href="https://code.jquery.com/ui/1.10.2/themes/smoothness/jquery-ui.css" />
   <script type="text/javascript" src="https://ajax.aspnetcdn.com/ajax/jQuery/jquery-3.2.1.min.js"></script>
   <script src="https://code.jquery.com/ui/1.12.1/jquery-ui.min.js"></script>
   <script src="https://cdn.quilljs.com/1.3.6/quill.js"></script>
   <link href="https://cdn.quilljs.com/1.3.6/quill.snow.css" rel="stylesheet">
To continue, create a new Analytics folder in the wwwroot folder of the project. Copy there infragistics.reveal.js, which you can find in the <InstallationDirectory>\SDK\Web\JS\Client of the Analytics SDK:

And then reference this library in _Layout.cshtml after the scripts for Day.js:
<script src="~/Analytics/infragistics.reveal.js"></script>
In the same file, also remove the footer section and add a link in the navigation for the new page:
   <li class="nav-item">
        <a class="nav-link text-dark" asp-area="" asp-controller="Home" asp-action="Marketing">Marketing</a>
   </li>
Let’s update the script in Marketing.cshtml with the logic for loading the dashboard:
    var dashboardId = "Marketing.rdash";

    $.ig.RVDashboard.loadDashboard(dashboardId, function (dashboard) {
        var revealView = new $.ig.AnalyticsView("#revealView");
        revealView.dashboard = dashboard;
    }, function (error) {
        //Process any error that might occur here
    });
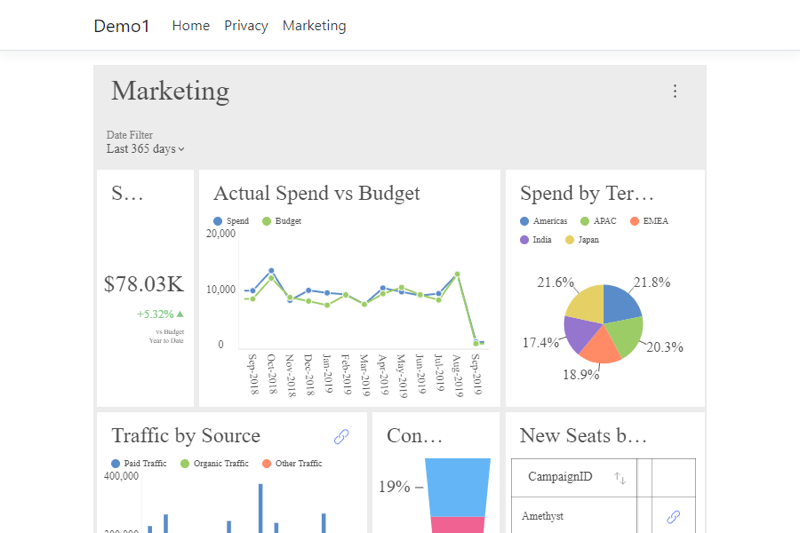
Finally, when running the web page, you can see the dashboard:
If you experience any issues, please refer to the Setup and Configuration (Web) topic.
Step 5 - Use Analytics Fonts
Analytics app uses Roboto fonts. In order to achieve the same look as in the app, download the fonts from https://fonts.google.com/specimen/Roboto and copy the following TTF files to the wwwroot/css folder of your project:
Roboto-Regular.ttf
Roboto-Bold.ttf
Roboto-Light.ttf
Roboto-Medium.ttf
Then, add references in the site.css as follows:
@font-face {
   font-family: "Roboto-Regular";
   src: url("Roboto-Regular.ttf");
}

@font-face {
   font-family: "Roboto-Bold";
   src: url("Roboto-Bold.ttf");
}

@font-face {
   font-family: "Roboto-Light";
   src: url("Roboto-Light.ttf");
}

@font-face {
   font-family: "Roboto-Medium";
   src: url("Roboto-Medium.ttf");
}
For font loading improvements add a reference to the Google Web Font Loader in _Layout.cshtml next to the infragistics.reveal.js reference:
<script src="https://ajax.googleapis.com/ajax/libs/webfont/1/webfont.js"></script>
Finally, modify the script section of the Marketing.cshtml page to take advantage of the font loader:
   WebFont.load({
        custom: {
            families: ['Roboto-Regular', 'Roboto-Bold', 'Roboto-Light', 'Roboto-Medium'],
            urls: ['/css/site.css']
        },
        active: function () {
            var dashboardId = "Marketing.rdash";

            $.ig.RVDashboard.loadDashboard(dashboardId, function (dashboard) {
                var revealView = new $.ig.AnalyticsView("#revealView");
                revealView.dashboard = dashboard;
            }, function (error) {
                //Process any error that might occur here
            });
        },
    });
Voila!

Step 6 - Style the Client Application
Instead of using the default template, you can style the Client application.
Remove the Privacy from HomeController.cs and modify the Index to redirect to Marketing:
   public IActionResult Index()
    {
        return RedirectToAction("Marketing");
    }
Also, remove the Index.cshtml and Privacy.cshtml files since they won’t be used. Remove the style setting for the <div> element in Marketing.cshtml.
Create а new img folder in wwwroot and copy there the logo.png, which you can download from here.
In _Layout.cshtml make the following changes:
Change the title from Demo1 to Overview
Remove the div after the header
Modify the header by adding logo, separator and title:
   <header>
        <div class="header">
            <img class="logo" src="~/img/logo.png" alt="logo" />
            <span class="line" />
            <h1>Overview</h1>
        </div>
    </header>
In site.css remove all the styles, except the ones we added for the Roboto fonts and add styles for the header:
  /* Header
    -------------------------------------------------- */

    header {
        display: flex;
        width: 100%;
        height: 70px;
        box-shadow: 0 4px 12px 0 rgba(0, 0, 0, 0.2);
        background-color: #37405a;
    }

    img.logo {
        width: 50px;
        height: 50px;
        margin: 10px;
        float: left;
    }

    span.line {
        float: left;
        width: 1px;
        height: 50px;
        margin-top: 10px;
        border: solid 1px #2b2e40;
    }

    h1 {
        float: left;
        padding-top: 12px;
        padding-left: 20px;
        height: 24px;
        font-family: Roboto-Regular;
        font-size: 20px;
        font-weight: 400;
        color: #ffffff;
    }
And styles for the body:
  /* Body
    -------------------------------------------------- */
    body {
        display: flex;
        flex-direction: column;
        background-image: linear-gradient(to bottom, #30365a, #2b2e40);
    }

    html, body {
        width: 100%;
        height: 100%;
    }

        body section {
            display: block;
            width: 100%;
            height: 100%;
            padding: 15px;
        }

    #revealView {
        height: 100%;
    }
And this should be your result:
