Setup and Configuration
Prerequisites
The Analytics Server SDK requires .NET Core 2.2+ or .NET Framework 4.6.2 ASP MVC application projects.
In case you are targeting .NET Framework 4.6.2+, the Analytics Server SDK supports a win7-x64 runtime environment. To debug your web project you need to add a win7-x64 compatible RuntimeIdentifier platform:
<PropertyGroup>

   <TargetFramework>net462</TargetFramework>

   <RuntimeIdentifier>win7-x64</RuntimeIdentifier>

</PropertyGroup>
Setup and Configuration (Server)
To set up the Analytics Web Server SDK you need to:
1. Getting Assemblies and Dependency Packages ready
To add references to assemblies and install dependency packages we recommend using NuGet package manager. The easiest way to setup your project is installing Analytics.Sdk.Web.AspNetCore (Trial) NuGet package.
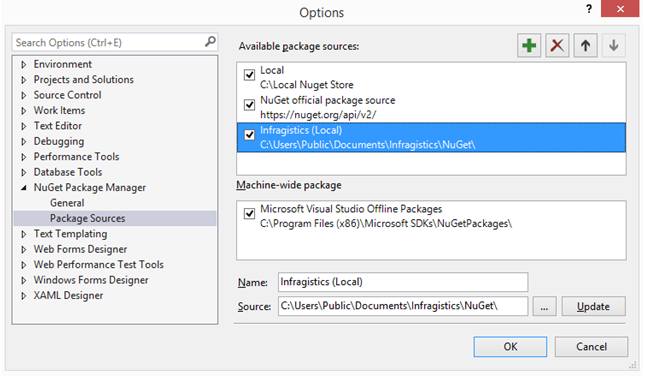
After installing the Analytics SDK, you should be able to find a new NuGet package source added to your nuget.config called Infragistics (Local) that points to “%public%\Documents\Infragistics\NuGet”.
After ensuring you have the Infragistics (Local) feed properly configured by the installer, you need to:
- install the Analytics.Sdk.Web.AspNetCore NuGet package to your application project.
- add a NuGet package reference to System.Data.SQLite version 1.0.111+
If you are having issues with the build, follow this link.
2. Defining the Server Context
After referencing the required DLLs, you need to create a class that inherits the AnalyticsSdkContextBase abstract class. This class allows the Analytics SDK to run inside of your host application and provides callbacks for working with the SDK.
using Analytics.Sdk;
public class AnalyticsSdkContext : AnalyticsSdkContextBase
{
    public override IRVDataSourceProvider DataSourceProvider => null;

    public override IRVDataProvider DataProvider => null;

    public override IRVAuthenticationProvider AuthenticationProvider => null;

    public override Task<Dashboard> GetDashboardAsync(string dashboardId)
    {
        var fileName = $"C:\\Temp\\{dashboardId}.rdash";
        var fileStream = new FileStream(fileName, FileMode.Open, FileAccess.Read);
        return Task.FromResult(new Dashboard(fileStream));
    }

    //This callback is used only when “onSave” event is not installed on the
    //AnalyticsView object client side. For more information see the web client SDK documentation
    public override Task SaveDashboardAsync(string userId, string dashboardId, Dashboard dashboard)
    {
        return Task.CompletedTask;
    }
}
The implementation above will load dashboards from “C:\Temp” folder, looking for a .rdash file that depends on the dashboardId variable. In your application, you may want to change this to load dashboards from another directory, from the database, or even from an embedded resource.
Note
Properties returning null: The first three properties, DataSourceProvider, DataProvider, and AuthenticationProvider, are all implemented to return null. In this guide you can find information about how to implement each of the interfaces for these properties, so they will no longer be implemented to return null.
3. Initializing the Server SDK
In the Startup.cs, in the ConfigureServices method of the application, call the services extension method AddAnalyticsServices, passing in the AnalyticsEmbedSettings class.
The AddAnalyticsServices extension method is defined in the Analytics.Sdk namespace, so you will need to add a using directive. In addition, you also need to set the CachePath property as shown below.
services.AddAnalyticsServices(new AnalyticsEmbedSettings
{
    LocalFileStoragePath = @"C:\Temp\Analytics\DataSources",
    CachePath = @"C:\Temp"
}, new AnalyticsSdkContext());
Note
LocalFileStoragePath is only required if you are using local Excel or CSV files as dashboard data source, and the AnalyticsSdkContext class inherits AnalyticsSdkContextBase as described above.
Finally, you need to add Analytics endpoints by calling the AddAnalytics extension method when adding MVC service. Similar to the following code snippet:
services.AddMvc().AddAnalytics();
Like AddAnalyticsServices, the AddAnalytics method is defined in the Analytics.Sdk namespace, so you need a using directive too.
4. Enabling server-side screenshot generation
In order to use the export to image functionality (either programmatically or through user interaction), you need to perform the steps below:
Get the following three files from <InstallationDirectory>\SDK\Web\JS\Server:
- package.json
- packages-lock.json
- screenshoteer.js
Copy the files to the root level of your project (parent folder of "wwwroot").
Make sure you have npm (the package manager for Node.js) installed.
If you don’t need the export to image functionality, you don’t need to copy the files to your projects. However, when trying to build the project, it will fail complaining that it cannot find npm.
To solve this error, add the following property to your project:
<PropertyGroup>
  <DisableAnalyticsExportToImage>true</DisableAnalyticsExportToImage>
</PropertyGroup>
Build Issues using NuGet
To handle a deployment issue related to SQLite.Interop.dll, custom .targets file are used in the NuGet package.
If you are having build issues, you can disable this behavior by adding the following property to your project:
<DisableSQLiteInteropFix>true</DisableSQLiteInteropFix>
Setup and Configuration (Client)
To set up the Analytics Web Client SDK you need to:
1. Checking Dependencies
The Analytics Web Client SDK has the following 3rd party references:
- jQuery 2.2 or greater
- Day.js 1.8.15 or greater
- Quill RTE 1.3.6 or greater
- Marker Clusterer v3 or greater
- Google Maps v3 or greater
2. Referencing the Web Client SDK
Enabling $.ig.AnalyticsView component in a web page requires several scripts to be included. These scripts will be provided as part of Analytics Web Client SDK.
<script src="~/Analytics/infragistics.reveal.js"></script>
JavaScript files can be found in "<InstallationDirectory>\SDK\Web\JS\Client".
3. Instantiating the Web Client SDK
Analytics’s Dashboard presentation is handled natively through the Web Client SDK.
To get started follow these steps:
Define a <div /> element with “id” and invoke the $.ig.AnalyticsView constructor.
Note
Hosting Client-Side and Server-Side Parts Separately If you want to host client-side and server-side parts on different servers, please read here before you continue to next step.
Call $.ig.RVDashboard.loadDashboard providing the dashboardId and success and error handlers.
In the success handler instantiate the $.ig.AnalyticsView component by passing a selector for the DOM element where the dashboard should be rendered into. Finally you should use the retrieved dashboard and set it to the dashboard property of the $.ig.AnalyticsView
Sample Code
<!DOCTYPE html>
<html>
  <head>
    ⋮
    <script type="text/javascript">
      var dashboardId = "dashboardId";

      $.ig.RVDashboard.loadDashboard(
        dashboardId,
        function (dashboard) {
          var revealView = new $.ig.AnalyticsView("#revealView");
          revealView.dashboard = dashboard;
        },
        function (error) {
          //Process any error that might occur here
        }
      );
    </script>
  </head>
  <body>
    <div id="revealView" style="height:500px;" />
  </body>
</html>