OAuth 2 / OIDC User Authentication with REST, OData, and Web Resources
When using OData Service, Rest API or Web resources, some of your resources might be protected. In this case, you need to grant Analytics access to these resources by setting up an OAuth 2 / OIDC account.
What is OAuth 2?
OAuth 2.0 is an authorization framework that supersedes the original OAuth protocol. It is commonly used to grant users limited access to specific resources, without exposing their credentials. Like OAuth 1.0, this protocol enables access from one location (third-party application or website) called OAuth client to another location with protected data.
For further information, please refer to OAuth 2.0.
What is OIDC?
OIDC is a simple identity layer on top of the OAuth 2.0 protocol. OIDC enables websites or applications to grant users access to their content by authenticating the user through their account in another service or application (е.g. Google, Office 365) saving them the trouble of maintaining a bunch of different accounts.
For further information, please refer to OpenID Connect.
Using protected resources with an OAuth 2 / OIDC Account
To use data sources with an OAuth 2 / OIDC account you will need to perform these 4 steps:
Register the OAuth Client (Analytics) on your resource server (this is the server hosting the resource, protected with OAuth, that you want to use - e.g. Microsoft, Google, etc.)
Choose one of the three data sources in Analytics, which are enabled to work with OAuth 2 / OIDC accounts - OData Service, Rest API or Web Resource.
Use credentials provided for the Client by the resource server to set up your OAuth 2 / OIDC account in Analytics.
Give Analytics permissions to access and use your data.
Registering an OAuth Client
Navigate to the resource server (e.g. Microsoft, Google, etc.) and register Analytics as an OAuth Client/Application by filling in the required information. Usually the name of the application and a redirect URL are required.
[!NOTE]Redirect URL. Pay attention that the redirect URL is provided in the Analytics's OAuth 2 / OIDC Account Details screen.
When you complete the registration, the resource server will generate the credentials necessary for configuring the OAuth 2 account in Analytics.
Choosing your data source
Navigate to Analytics and choose a data source - OData Feed, Rest API or Web Resource.
Provide the URL where the data is located.
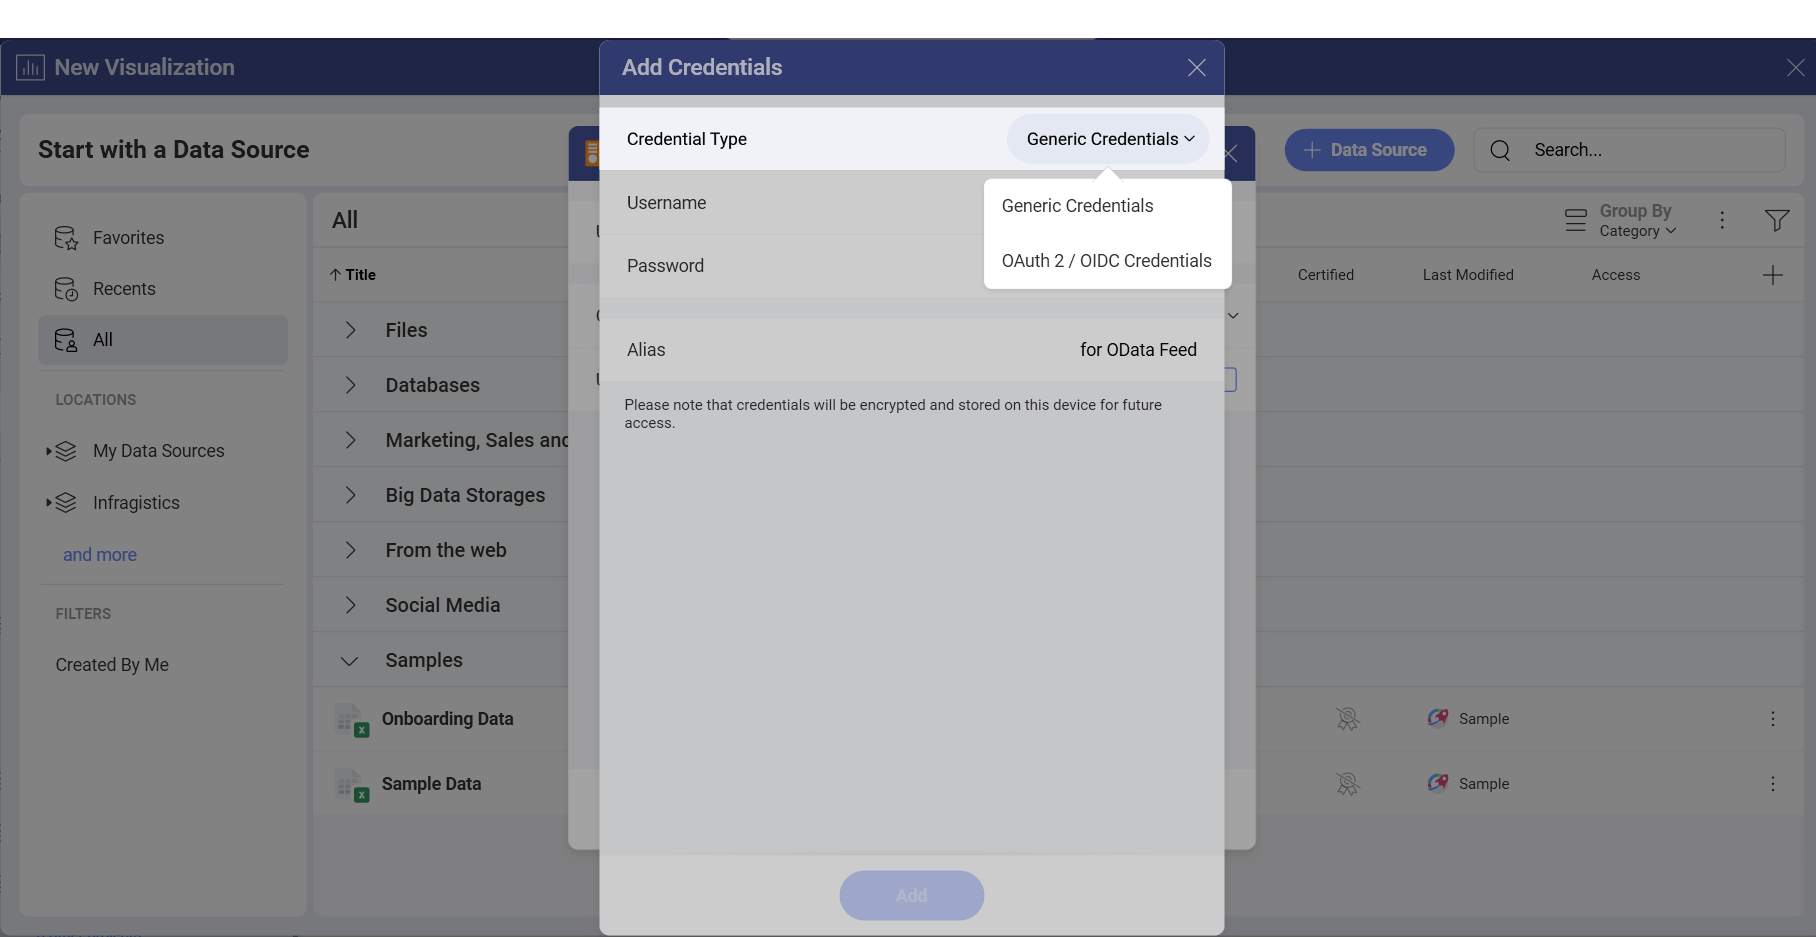
Click/tap on +Credentials.
Select OAuth 2 / OIDC Credentials from the Credential Type drop-down menu:
Setting up your OAuth 2 / OIDC account in Analytics
In the OAuth 2 / OIDC Account Details screen you will need to fill in the credentials that are already generated for Analytics by the resource server.
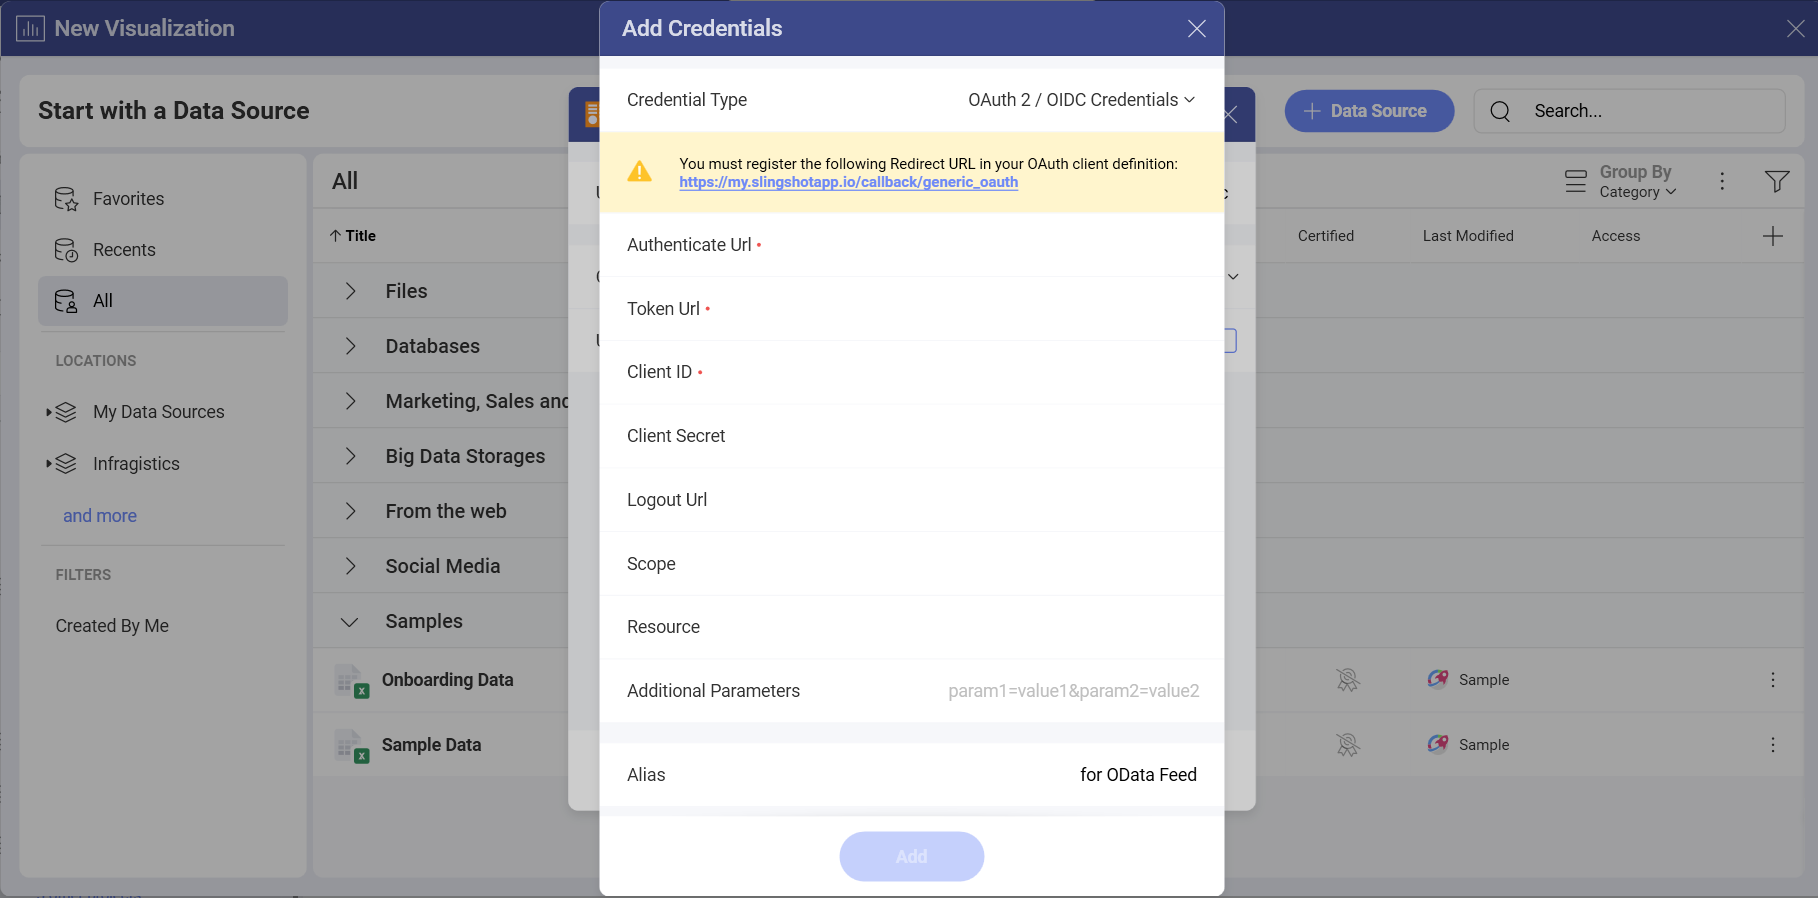
The following fields are mandatory:
Authenticate Url: The authenticate URL is usually in a format such as: https://authorization-server.com/oauth2/authorize (e.g. https://login.microsoftonline.com/common/oauth2/authorize).
Token URL: The format of the token URL is similar to the one of the Authenticate URL (e.g. https://login.microsoftonline.com/common/oauth2/token).
Client ID: The Client ID is the identifier for your app (Analytics). Its format is a random combination of symbols. You will receive a Client ID when you first register Analytics as an OAuth Client.
Other fields are not marked as mandatory in Analytics but depending on your OAuth service you might also need to provide the following:
Client Secret: The client secret is used as additional protection. Its format is a random combination of symbols.
Logout URL
Scope: Scope values are used to request additional levels of access. The values will depend on the particular service.
Resource: Here you need to input the URL to the service, which hosts the protected data (e.g. https://infragisticsinc297.sharepoint.com)
Additional Parameters
Alias of the data source: Your data source name will be displayed in the list of accounts. You can always change it.