Tasks
When it comes to running a successful project – task management is at the heart of that. You need everything organized in one place to manage tasks throughout the full lifecycle of the project. Setting deadlines, dependencies, and priorities are all essential to ensure projects stay on track and get completed on time.
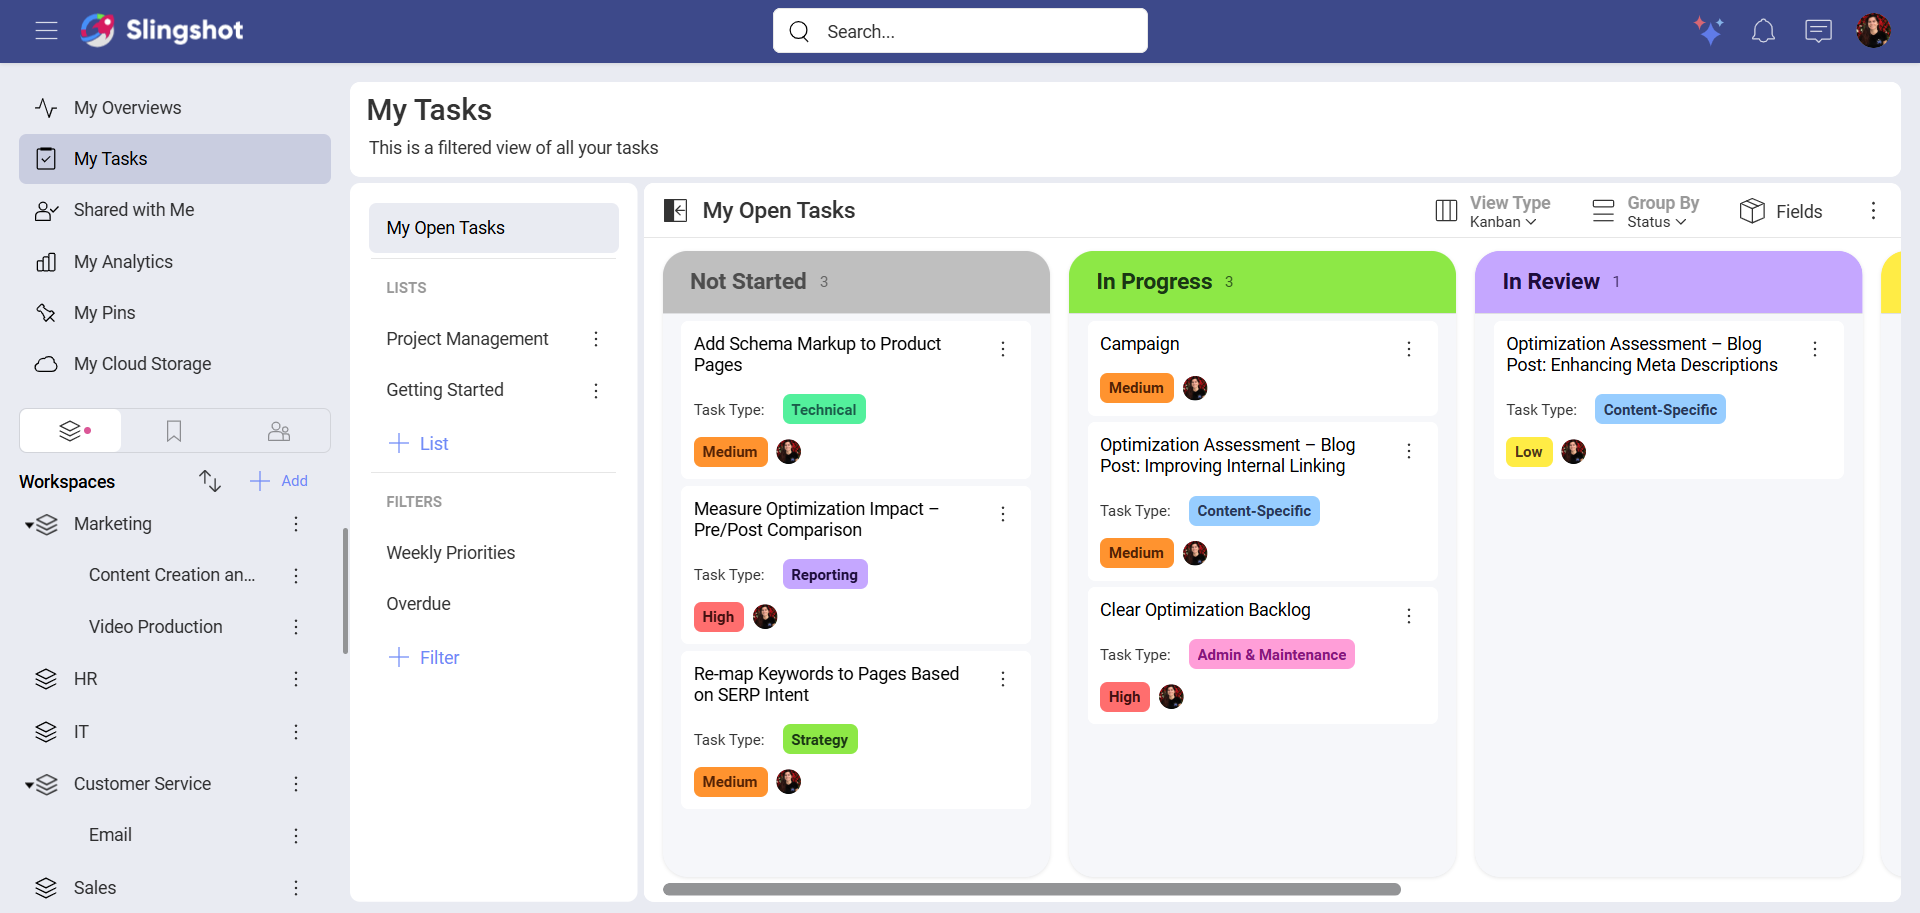
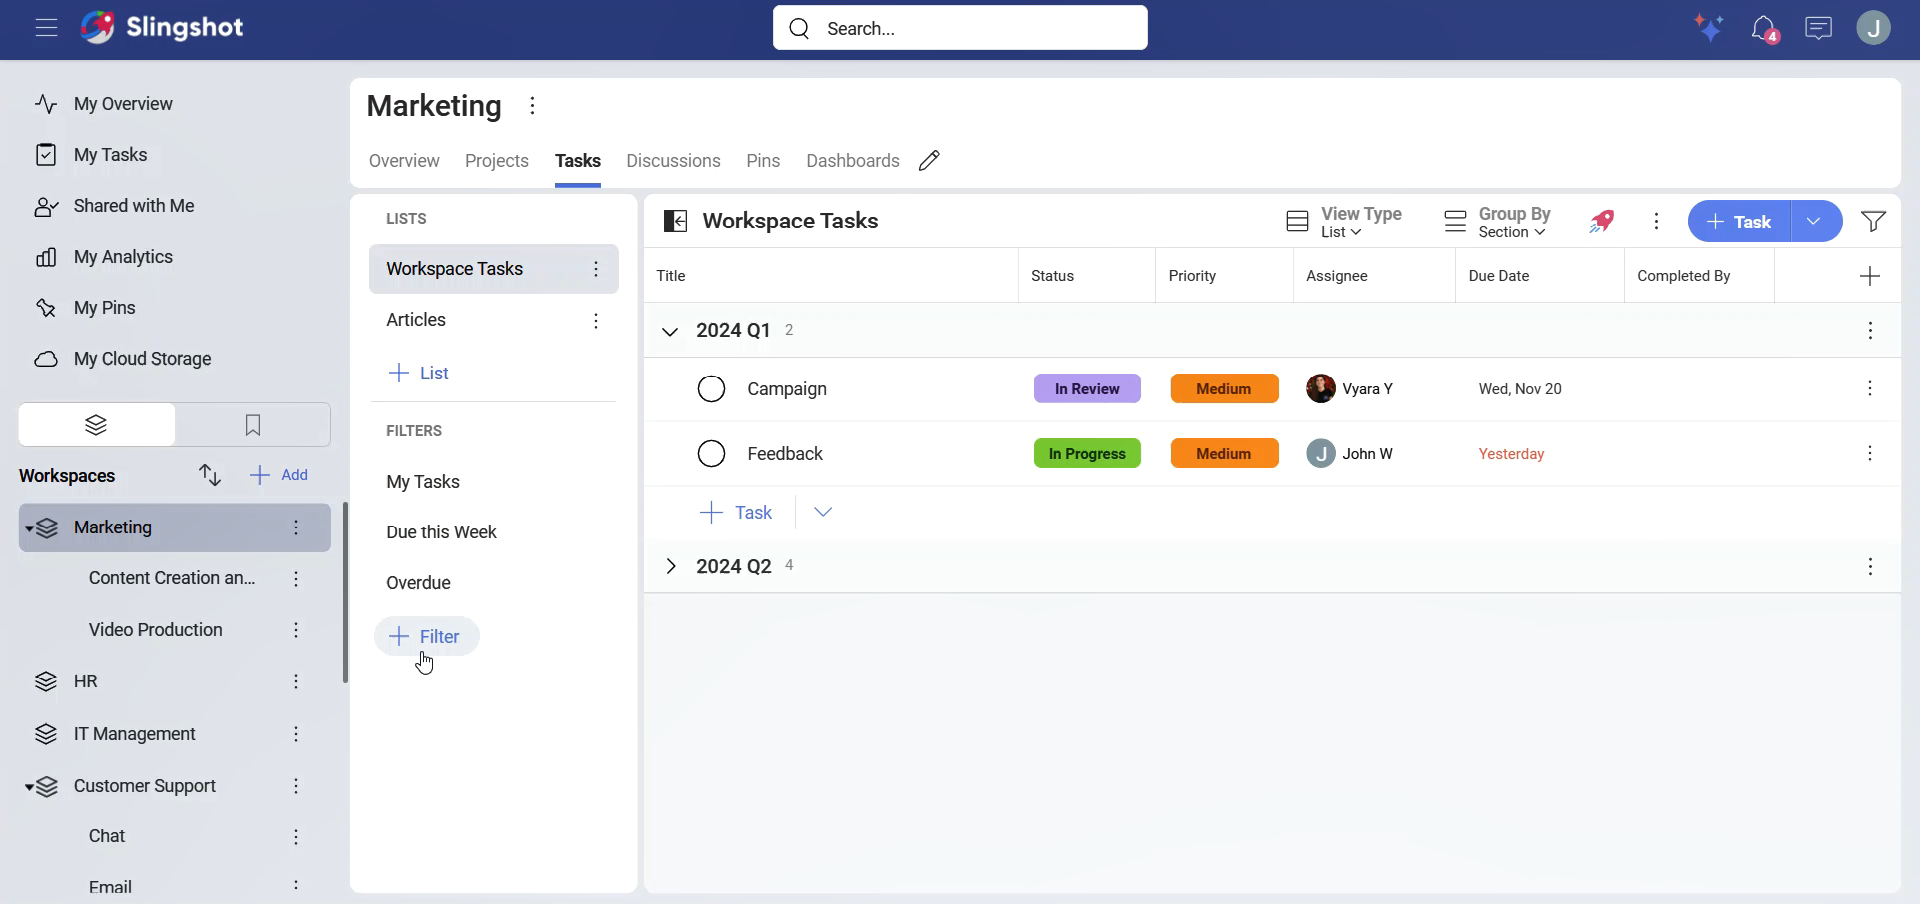
There is a Tasks tab available within your workspaces and projects, listing all the tasks assigned to everyone in those workspaces and projects. You can view your own tasks assigned to you in the My Open Tasks section within My Tasks.
What are Tasks?
Tasks are a visual representation of work that needs to get done. Within tasks, you can store relevant documents, set clear ownership of responsibility, and have threaded conversations, so everything is transparent in one place.
How to Create a Task
There are multiple ways to create a task in Slingshot:
Using the + Task button will add a task to the bottom of your list.
If you are using sections, you can quickly add a task to a section using the inline + Task.
If you want to insert a task right above or below another, you can do so from that task overflow menu.
You can also import tasks from a CSV file to quickly bring in existing task data from spreadsheets or other tools. Learn more in Importing Tasks from a CSV File.
You can set a task to repeat automatically on a schedule. Learn more in Recurring Tasks.
Subtasks can be created from inside the task card or from the parent task's overflow menu.
[!IMPORTANT] Slingshot Tip: You can also create tasks directly from a chat, pin or dashboard in Slingshot. Check out more productivity flows from within Slingshot to enhance your productivity.
Task Fields
Tasks are very important for driving the productivity of your teams and projects. Your task card, without any added custom fields, has the following fields:
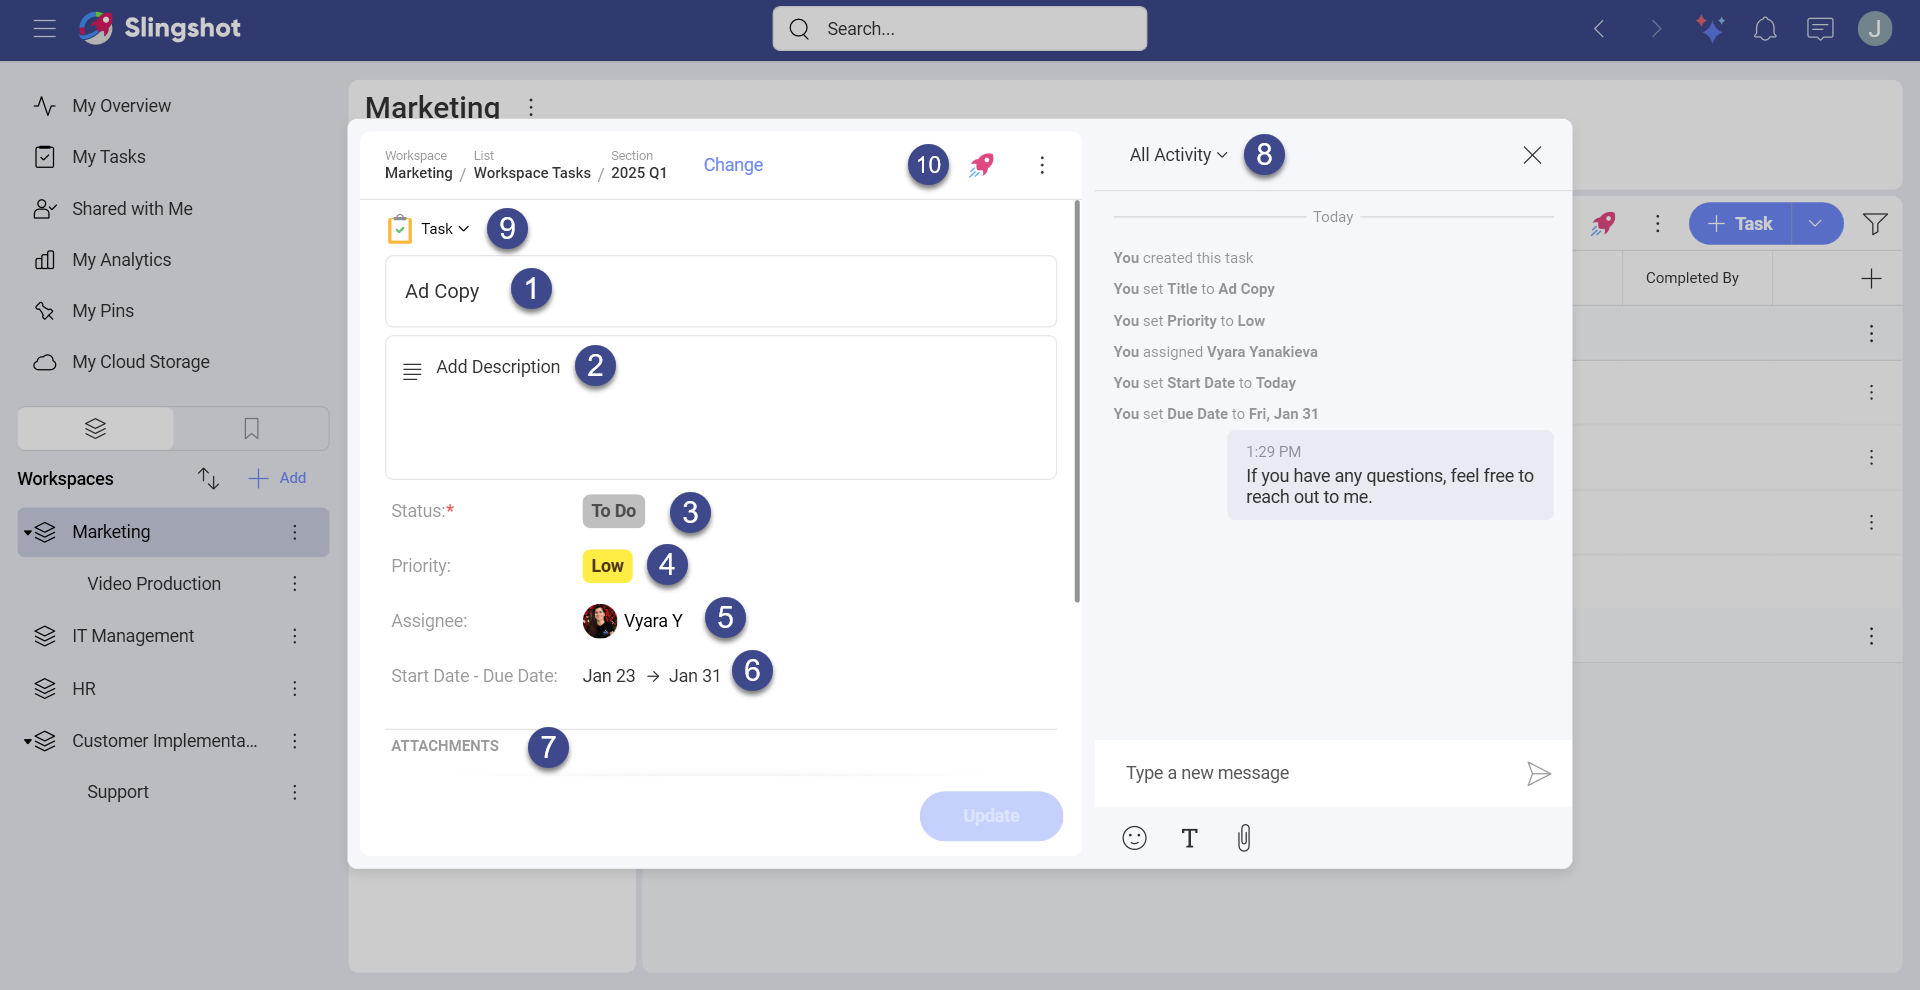
Task Title: Set a clear title for your tasks.
Description: Add further details around your tasks so the assignee(s) can understand what needs to get done.
Status: Set the status of the task such as In Review, In Progress or Completed.
Priority: Set priorities for your teams so they can better manage their workloads effectively.
Assignee(s): Assign either one person, multiple, group or workspace to a task.
Start Date & Due Date: Set clear expectations on deadlines with start and due dates.
Attachments: Add documents and files (for example, URLs, dashboards or data sources) to the task.
Activity: Have threaded conversations around your tasks in context.
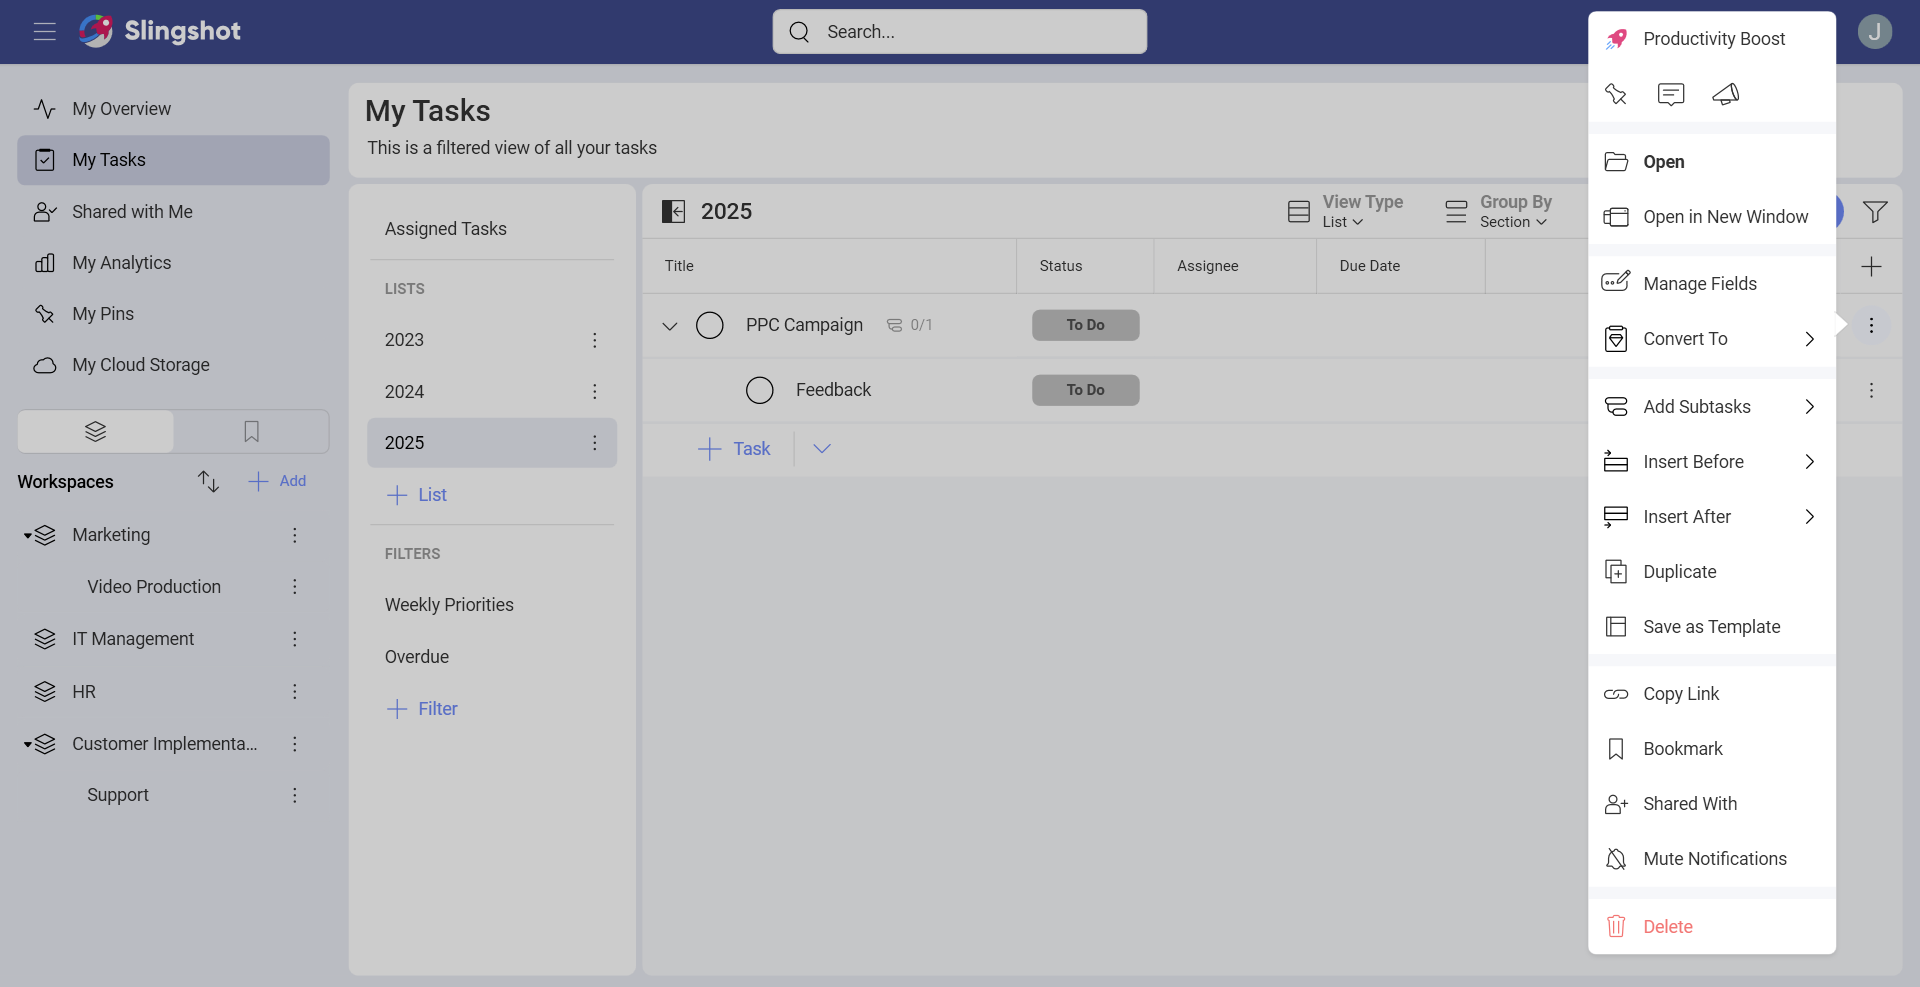
Convert To: Change the type of the task.
Productivity Boost: Pin the task, start a chat or discussion directly from the Productivity Boost icon.
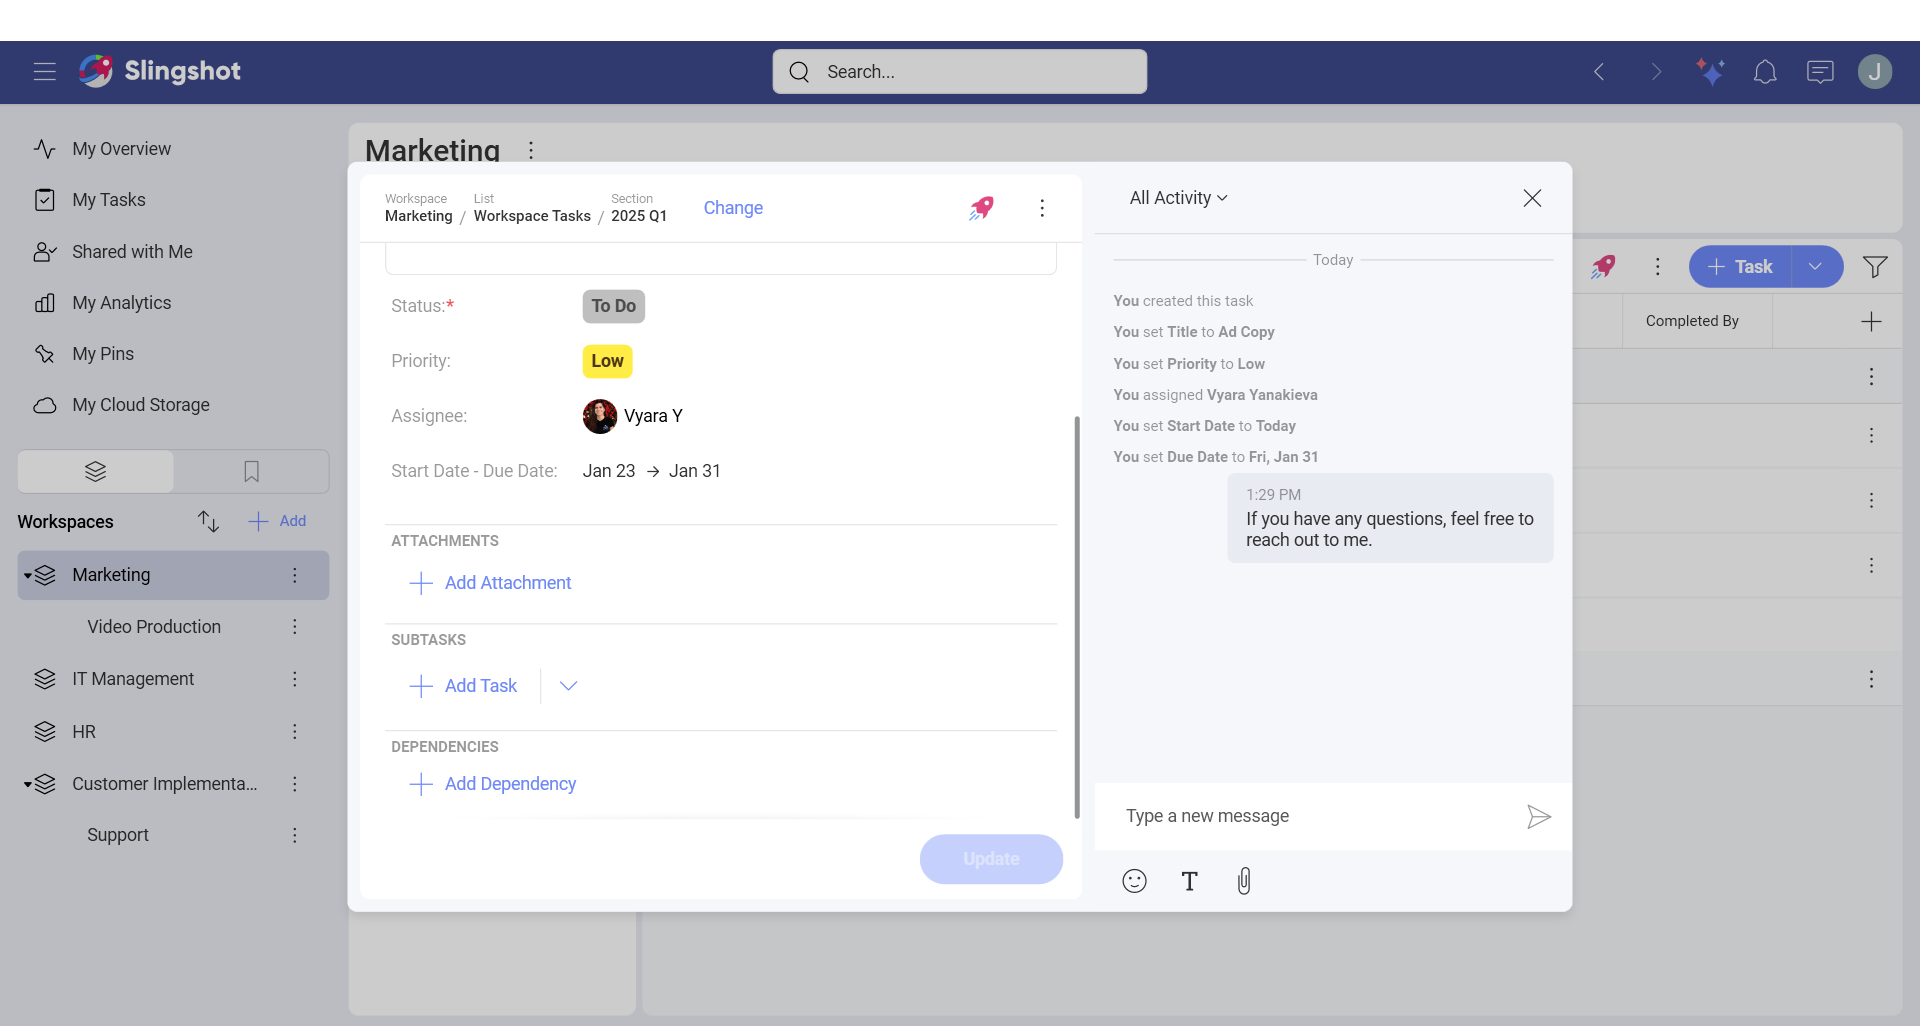
If you want to add subtasks or dependencies to the task, you can scroll down in the task card.
Default Task Fields
For better organization of your tasks, you can use default task fields. To open the list of default task fields, you can click/tap on the plus button in the top right corner of a task list.

Here you can choose from the following fields: Completed, Status, Priority, Assignee, Start Date, Due Date, Attachments, Dependencies, Date Created, Description, Date Completed, and Completed By.
Custom Task Fields
With Custom Fields, you can shape your tasks to better match your internal work processes. To find out more about custom fields, click/tap here.
Task Description
In the task description section, you can add additional details around your tasks with the help of different text formatting tools. You can also add URLs, as well as emojis.
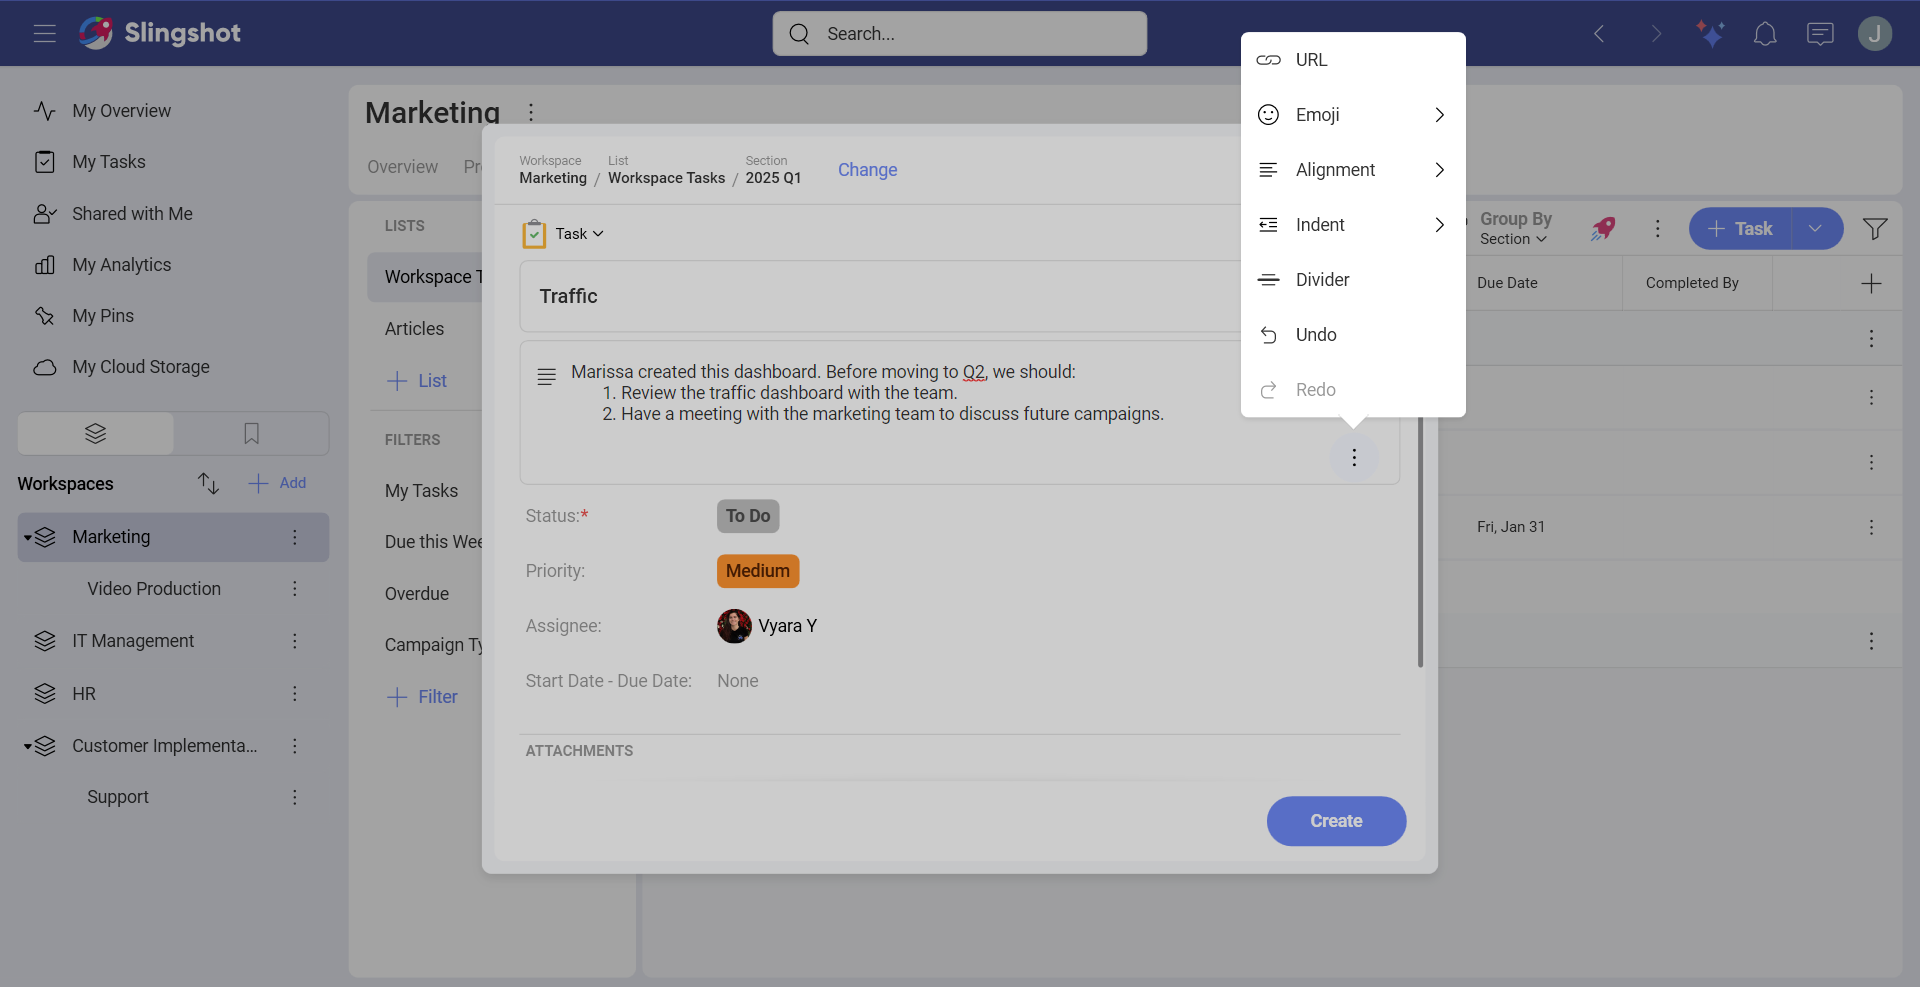
Note that currently these options are available only for macOS Monterey.
Task Duplication
Instead of creating a whole new set of tasks, you can save some time and be more productive by duplicating a task with the steps mentioned below.
Click on the overflow menu of the task.
Choose Duplicate.
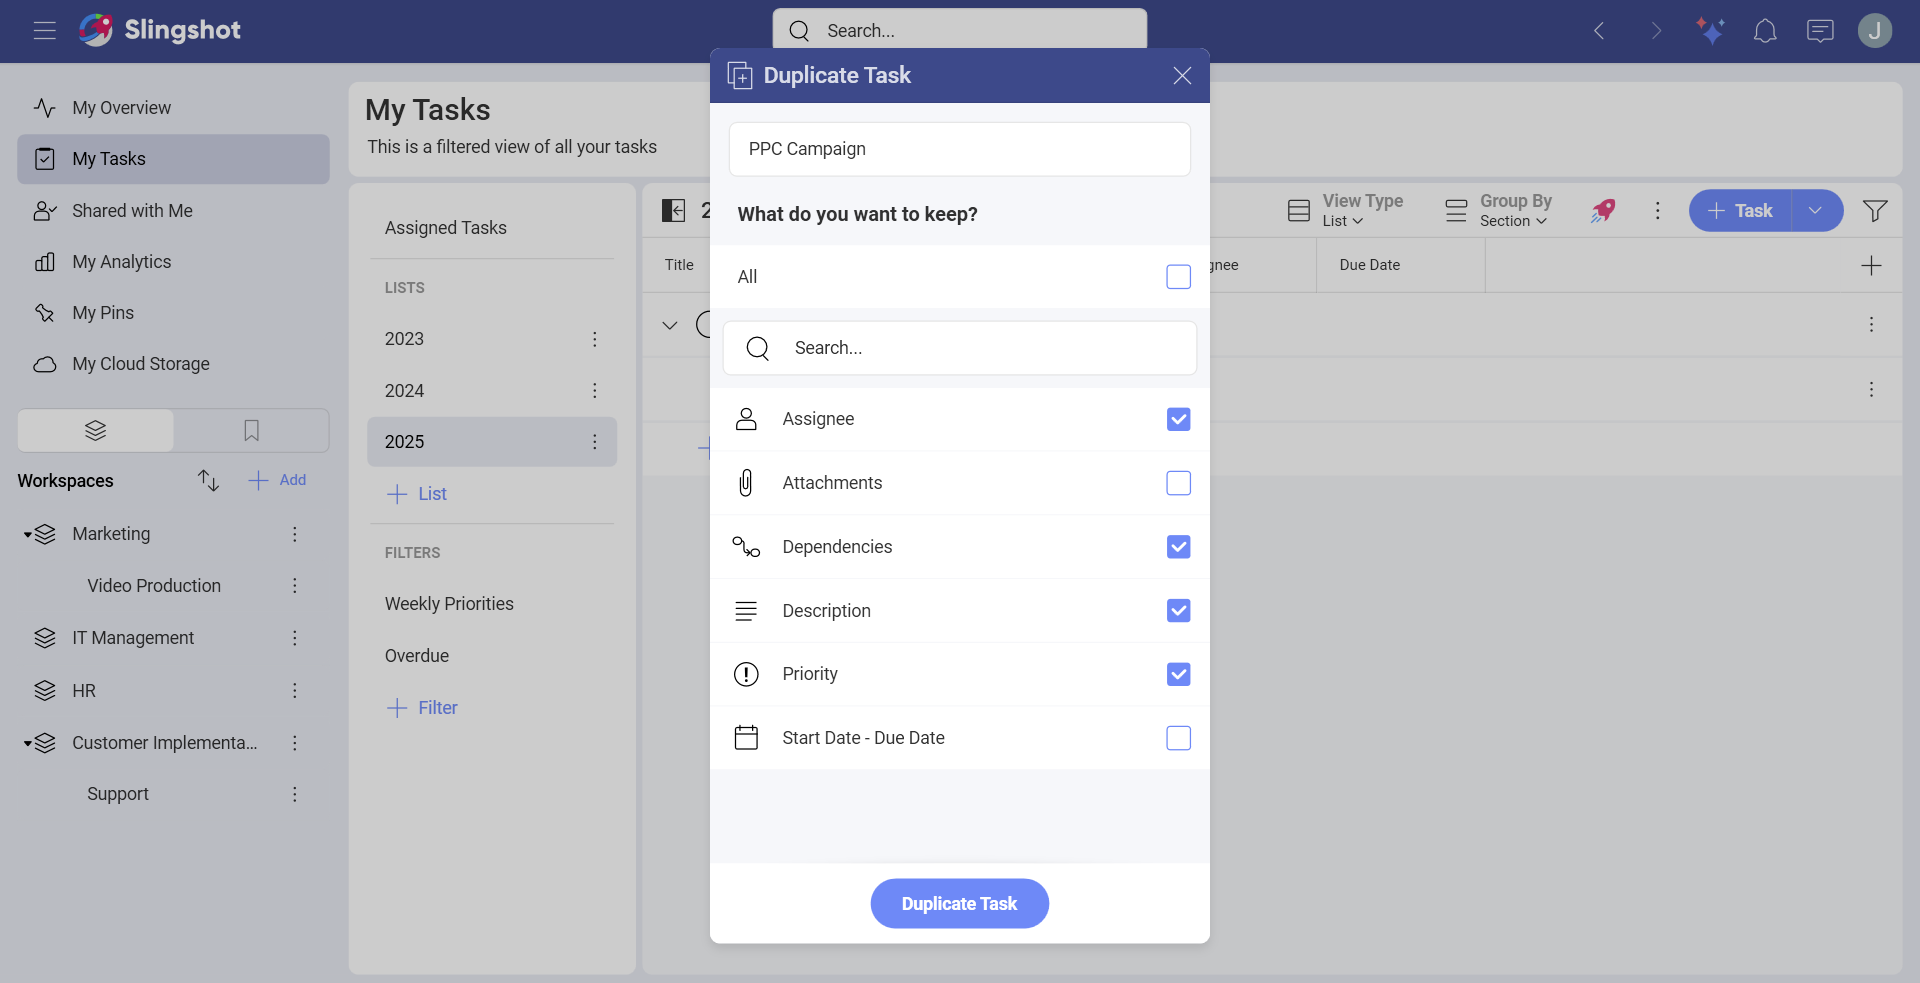
- A dialog will open, where you can choose what you want to keep when you duplicate the task. You can also change the title of the task. If you decide to keep the same assignees, you’ll be presented with the option to notify them once the task is created.
- Once you’ve saved your preferences, you will see the task card where you can make changes.
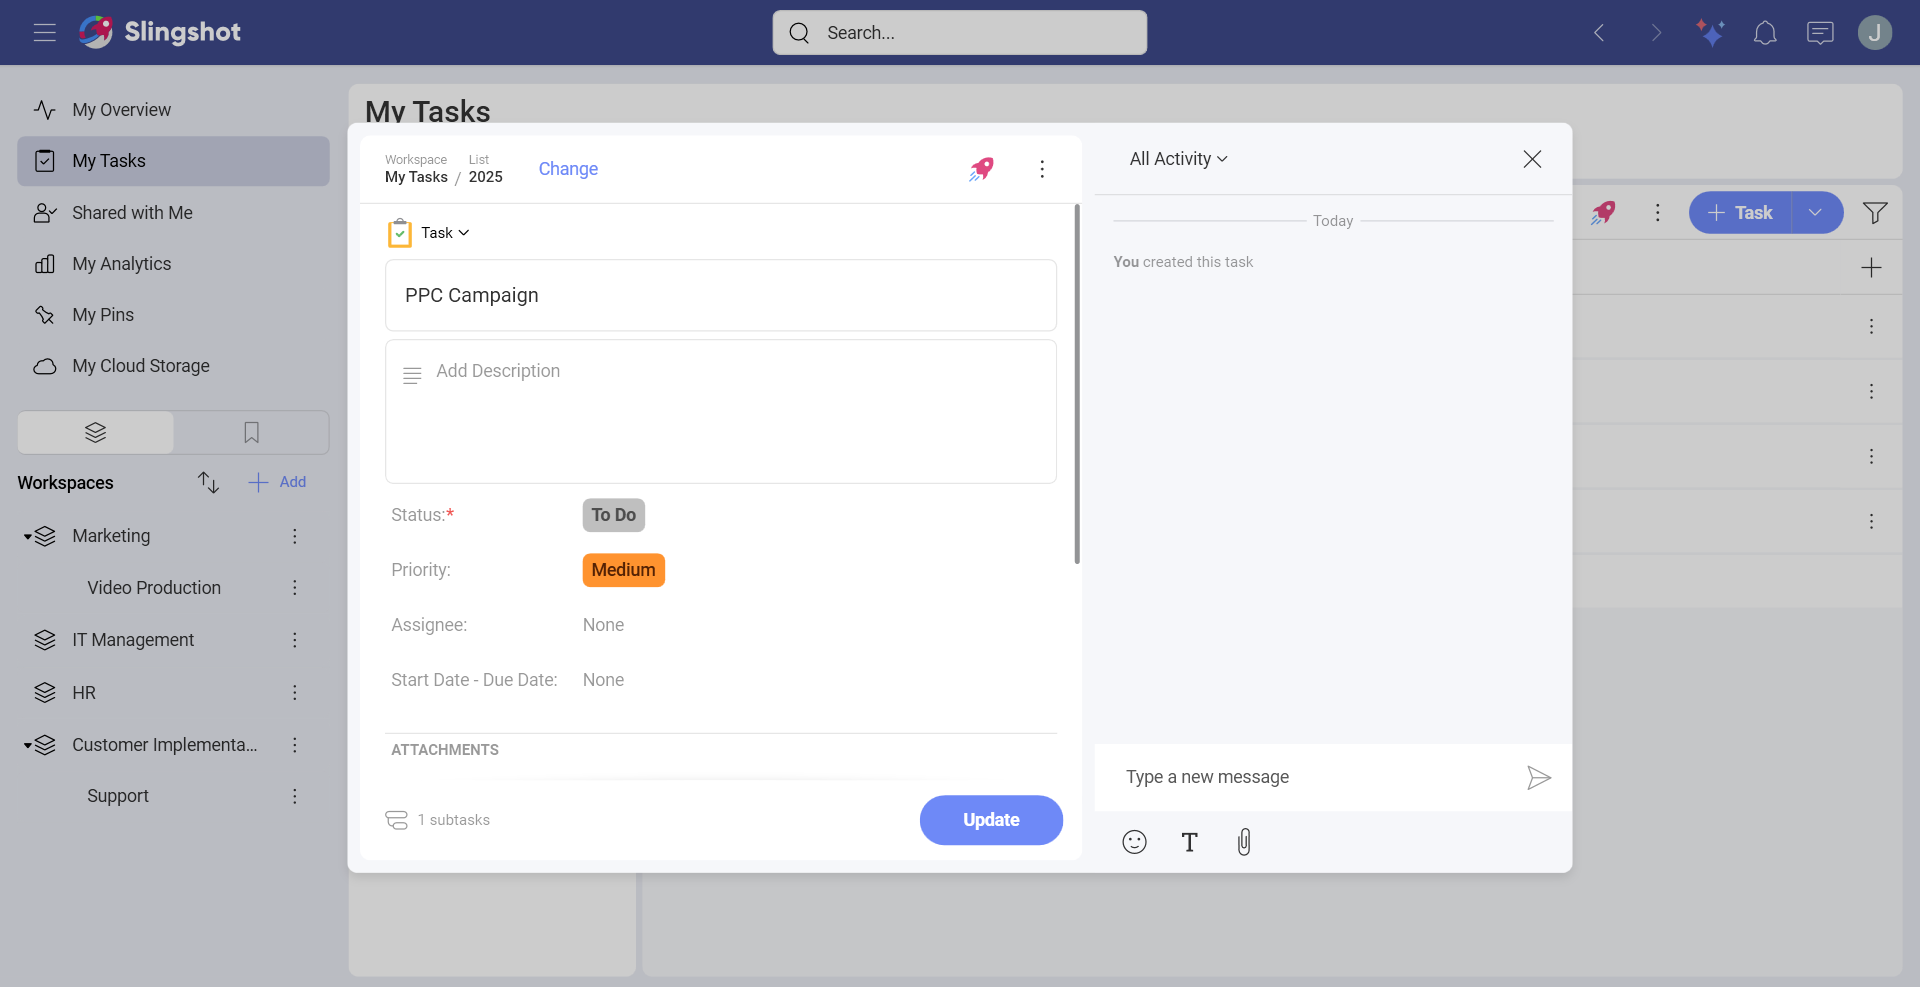
- When you are ready, you can click on Update. You can find the task in the specific location that you have saved it.
[!NOTE] If you decide to duplicate a parent task, you can duplicate all the subtasks associated with it. They will show up in the same location as the parent task.
Organizing Tasks
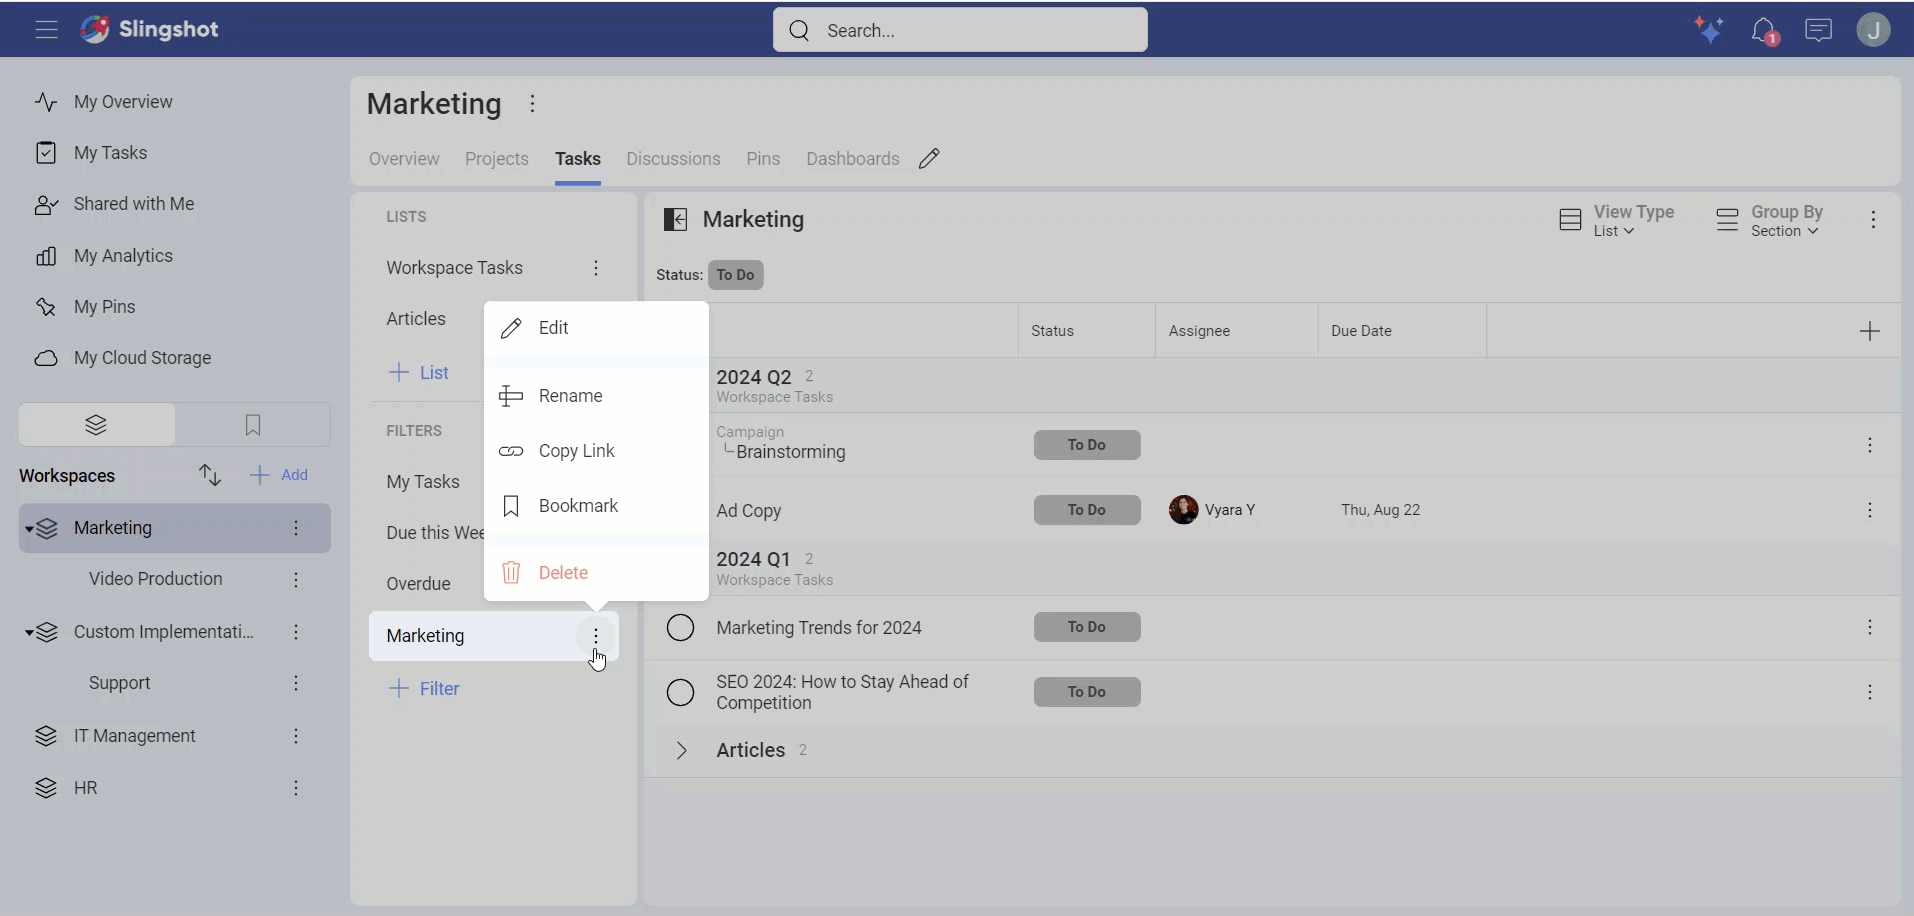
You can organize your tasks into lists to further group them together. Within lists, you can also add sections to categorize your lists further. Tasks are movable with drag and drop or the change button within your task card between lists and sections.
Task Views
You can choose between four views (Calendar, List, Kanban, Timeline) to take advantage of a different layout to maximize utility. Use the View Type drop-down menu to switch between views.
Within each of the task views you can filter the tasks in a way that best suits your teams' goals.
Calendar
View your tasks on the calendar in order to have a better overview of your teams' schedules and their progress on tasks.
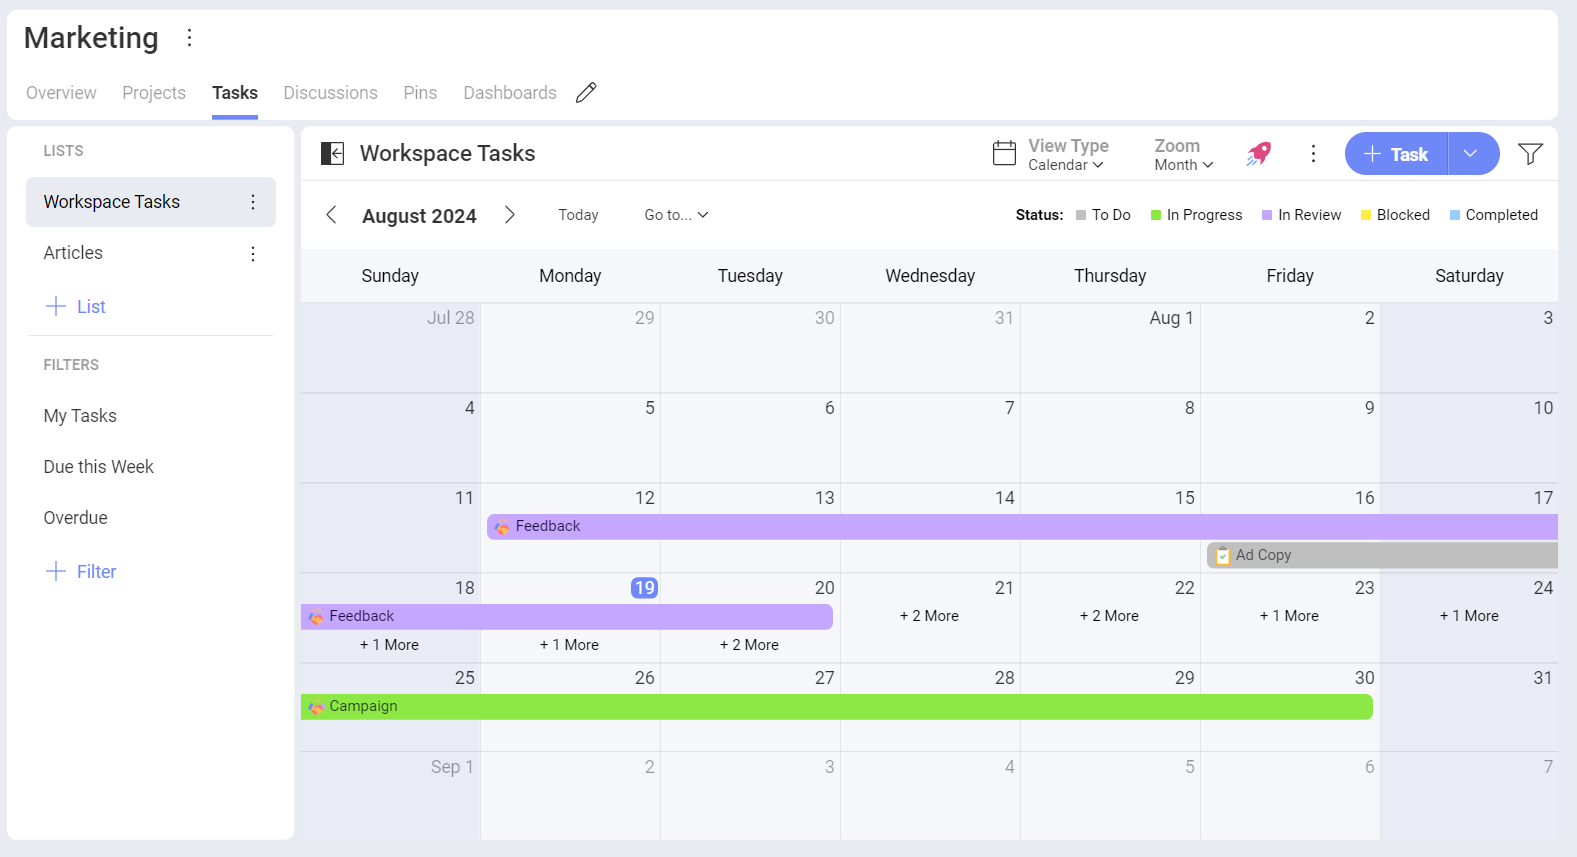
Use Calendar view if you want to:
Change the Start Date and the Due Date with a simple drag and drop.
Pick a single date for a task with just one click.
Have a quick glimpse of unscheduled tasks. (To view your unscheduled tasks, click/tap on the three dot menu next to the View Type and choose Show Unscheduled Items.)
List
Project manage and update tasks faster from within your list view.
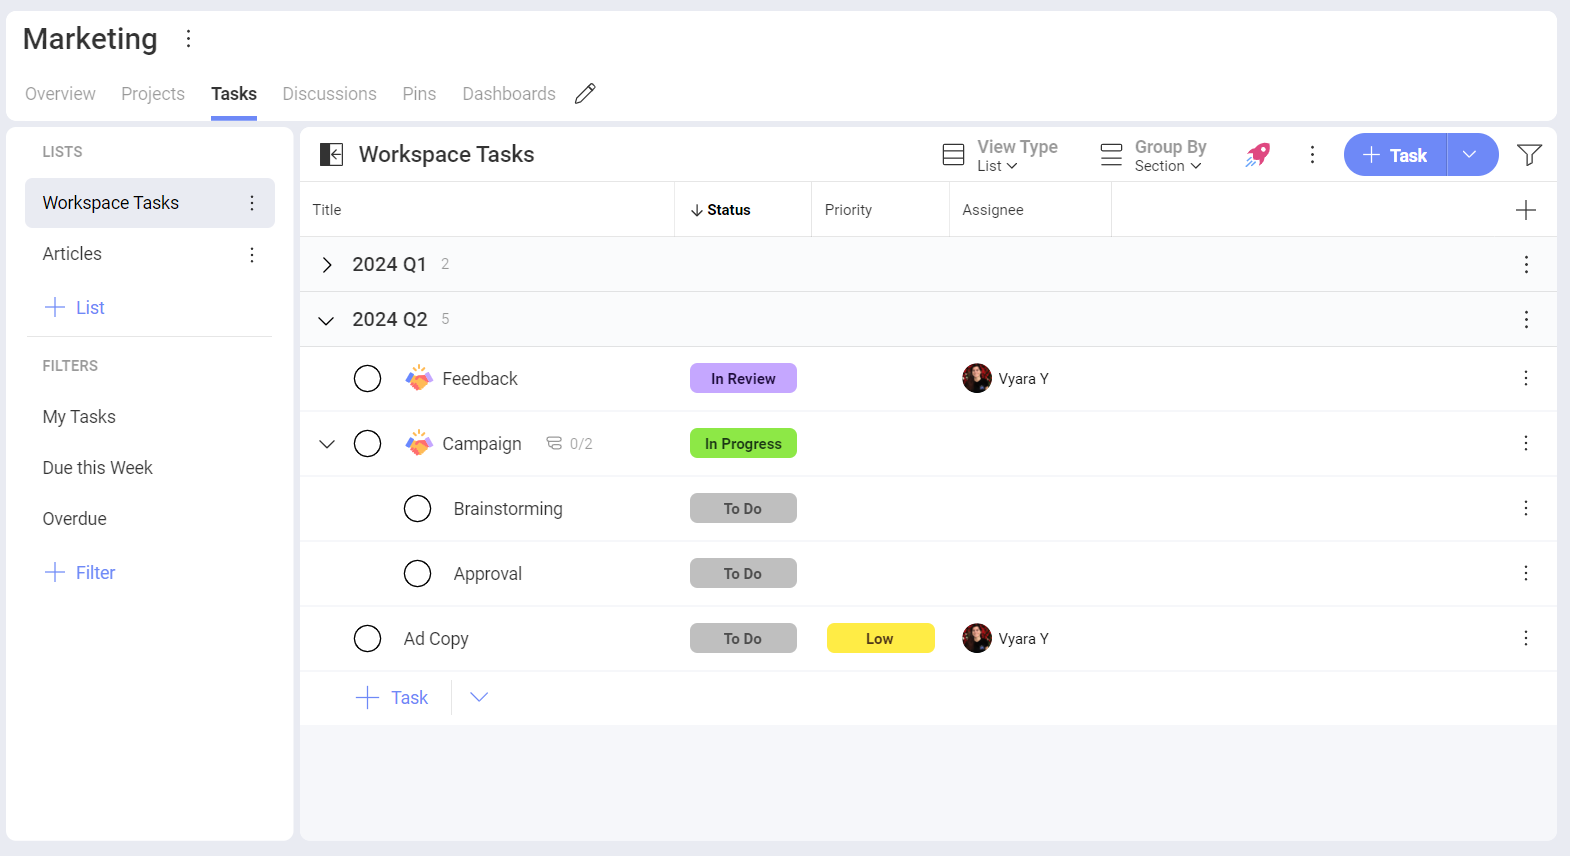
Use List view if you want to:
Easily visualize subtasks and the task hierarchy.
Sort or group tasks by any criteria.
Organize tasks using sections.
Kanban
View your tasks as cards within columns that represent different stages of the Status workflow. You can drag and drop your tasks between columns to change their status.
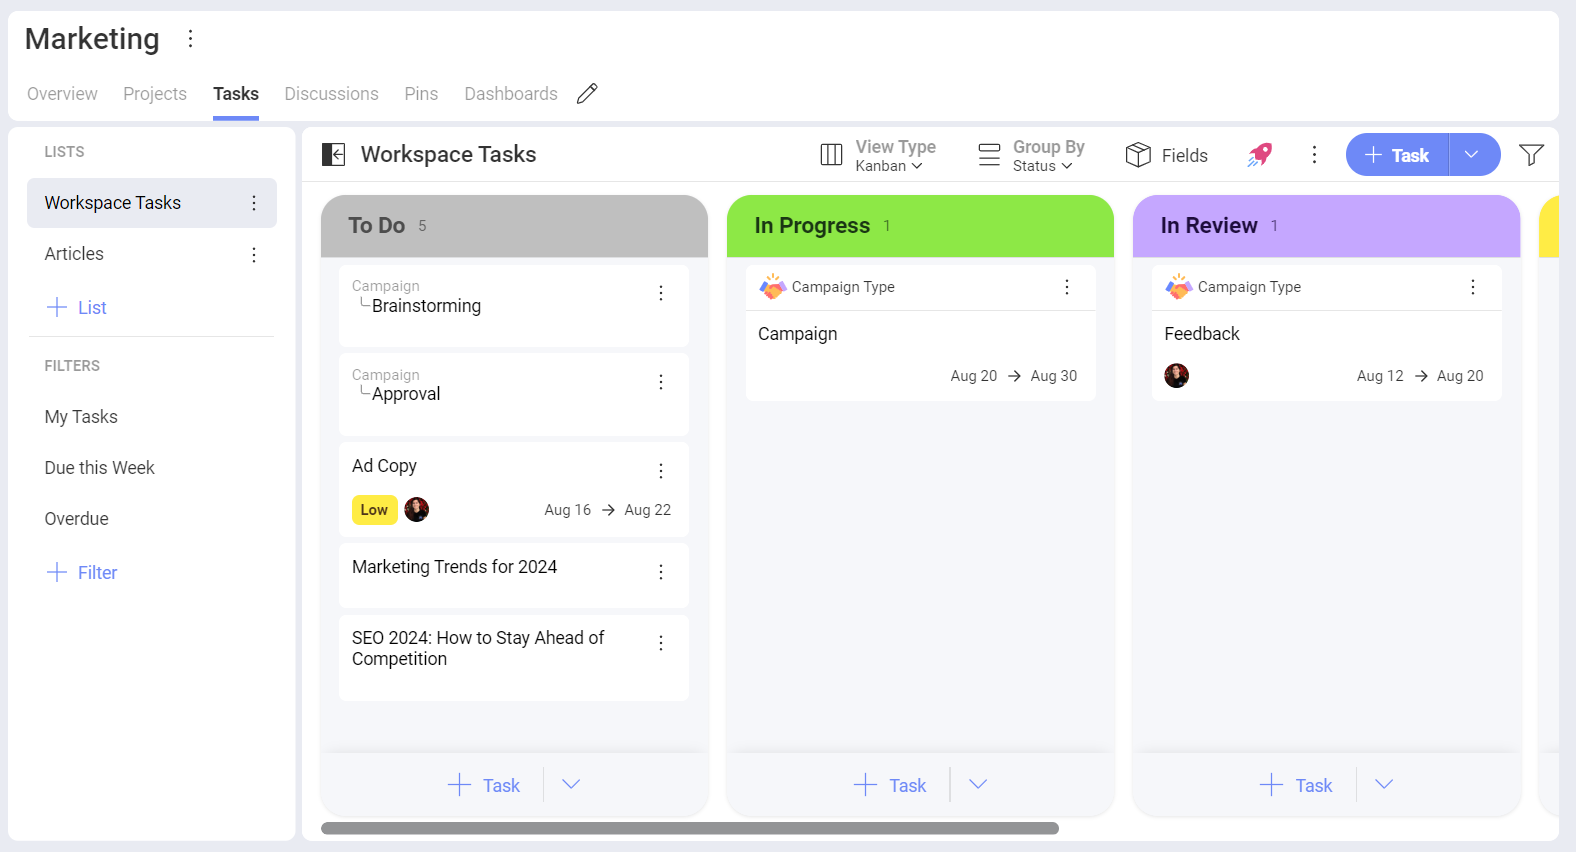
Use Kanban view if you want to:
Focus on the status workflow and visualize it in a graphical way.
Quickly get a glance of the overall status of a list of tasks.
Timeline
See a clear path for project completion and dependencies by using timeline view. Zoom in or out to see your timeline by days, weeks or months.
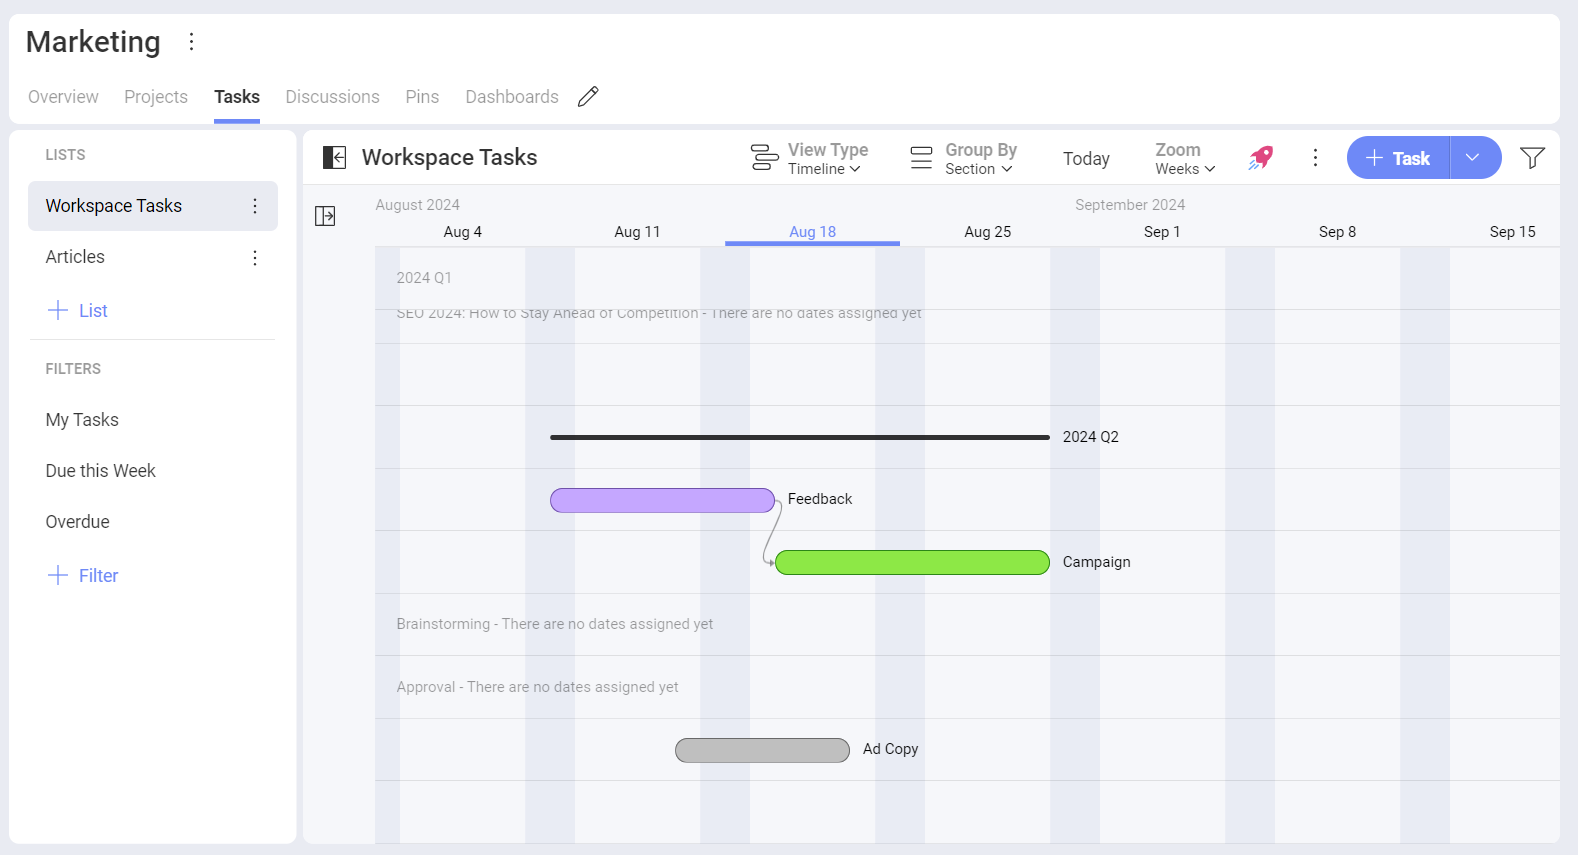
Use Timeline view if you want to:
Visualize several task dependencies at once.
Frame tasks in time in a graphical way.
Global Default View
The global default view is the view all users see when they first open a task list.
Only an owner of a workspace or a project can set up a global default view. You can also set up a global default view for each of your own task lists under My Tasks.
To save a specific global default task view for a task list, you can:
Open the oveflow menu next to the Productivity Boost button.
Click/tap on Save Current View As....
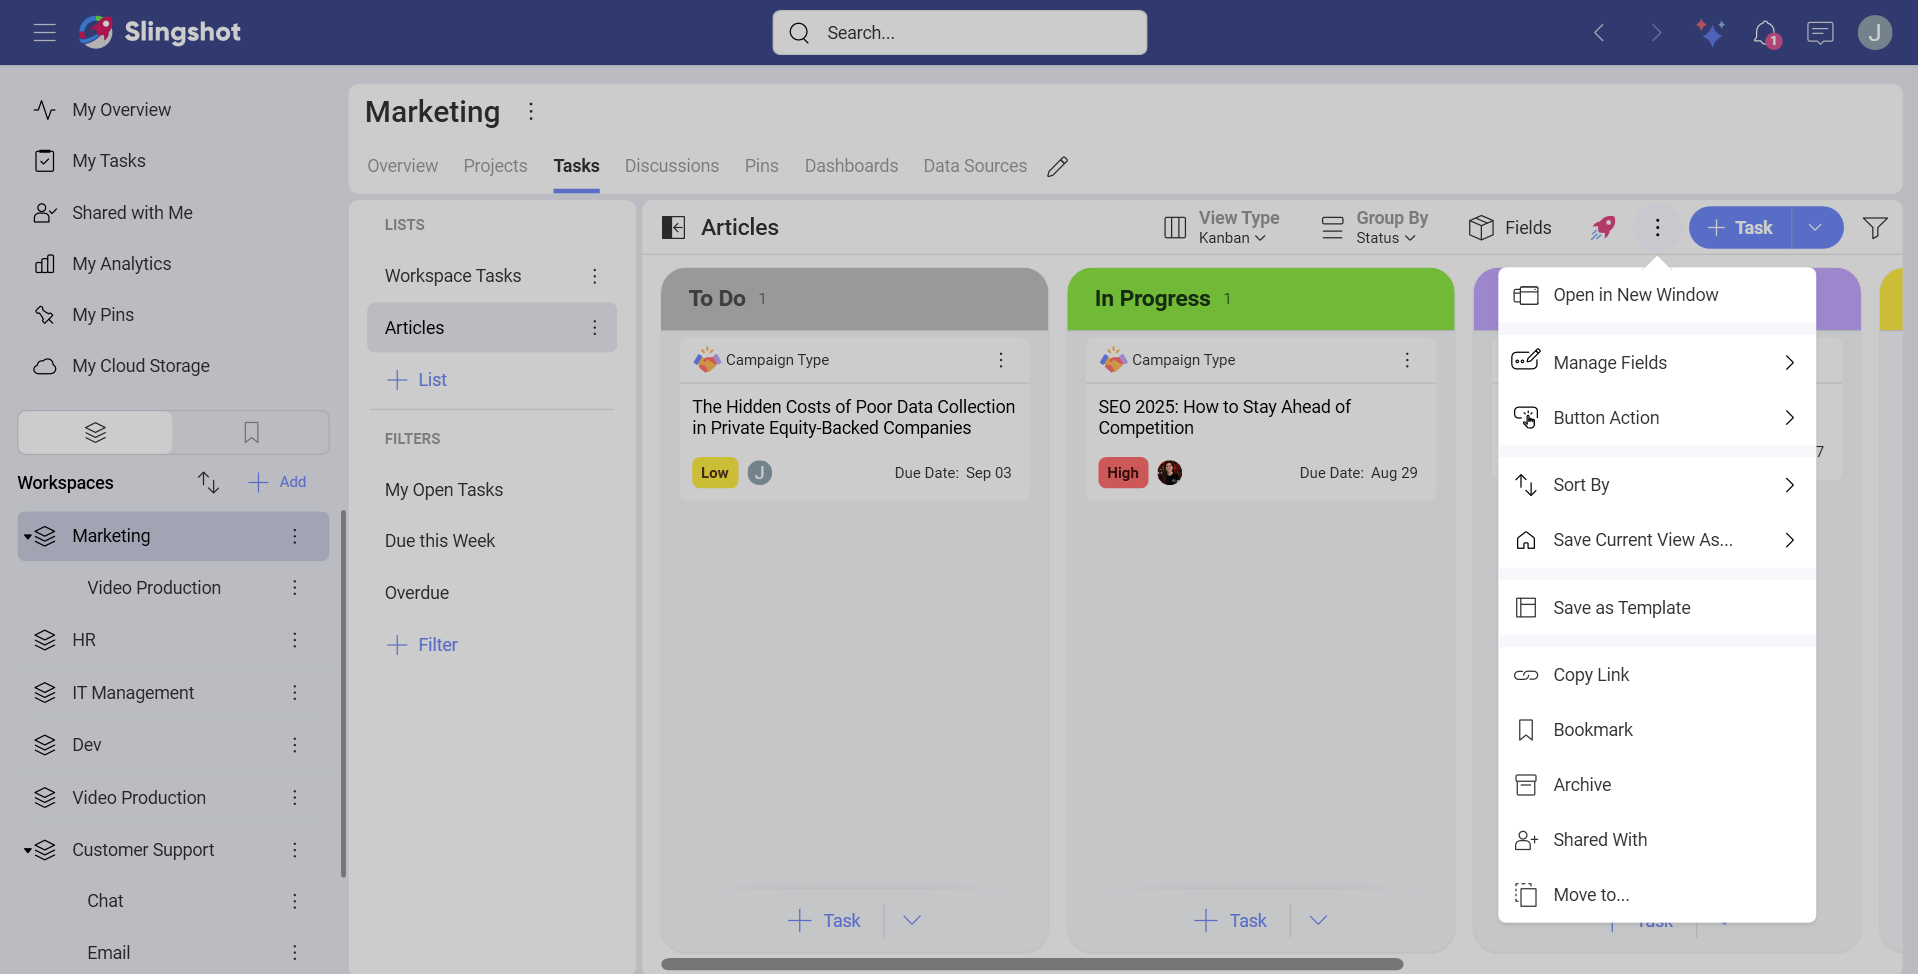
- Click/tap on Global Default.
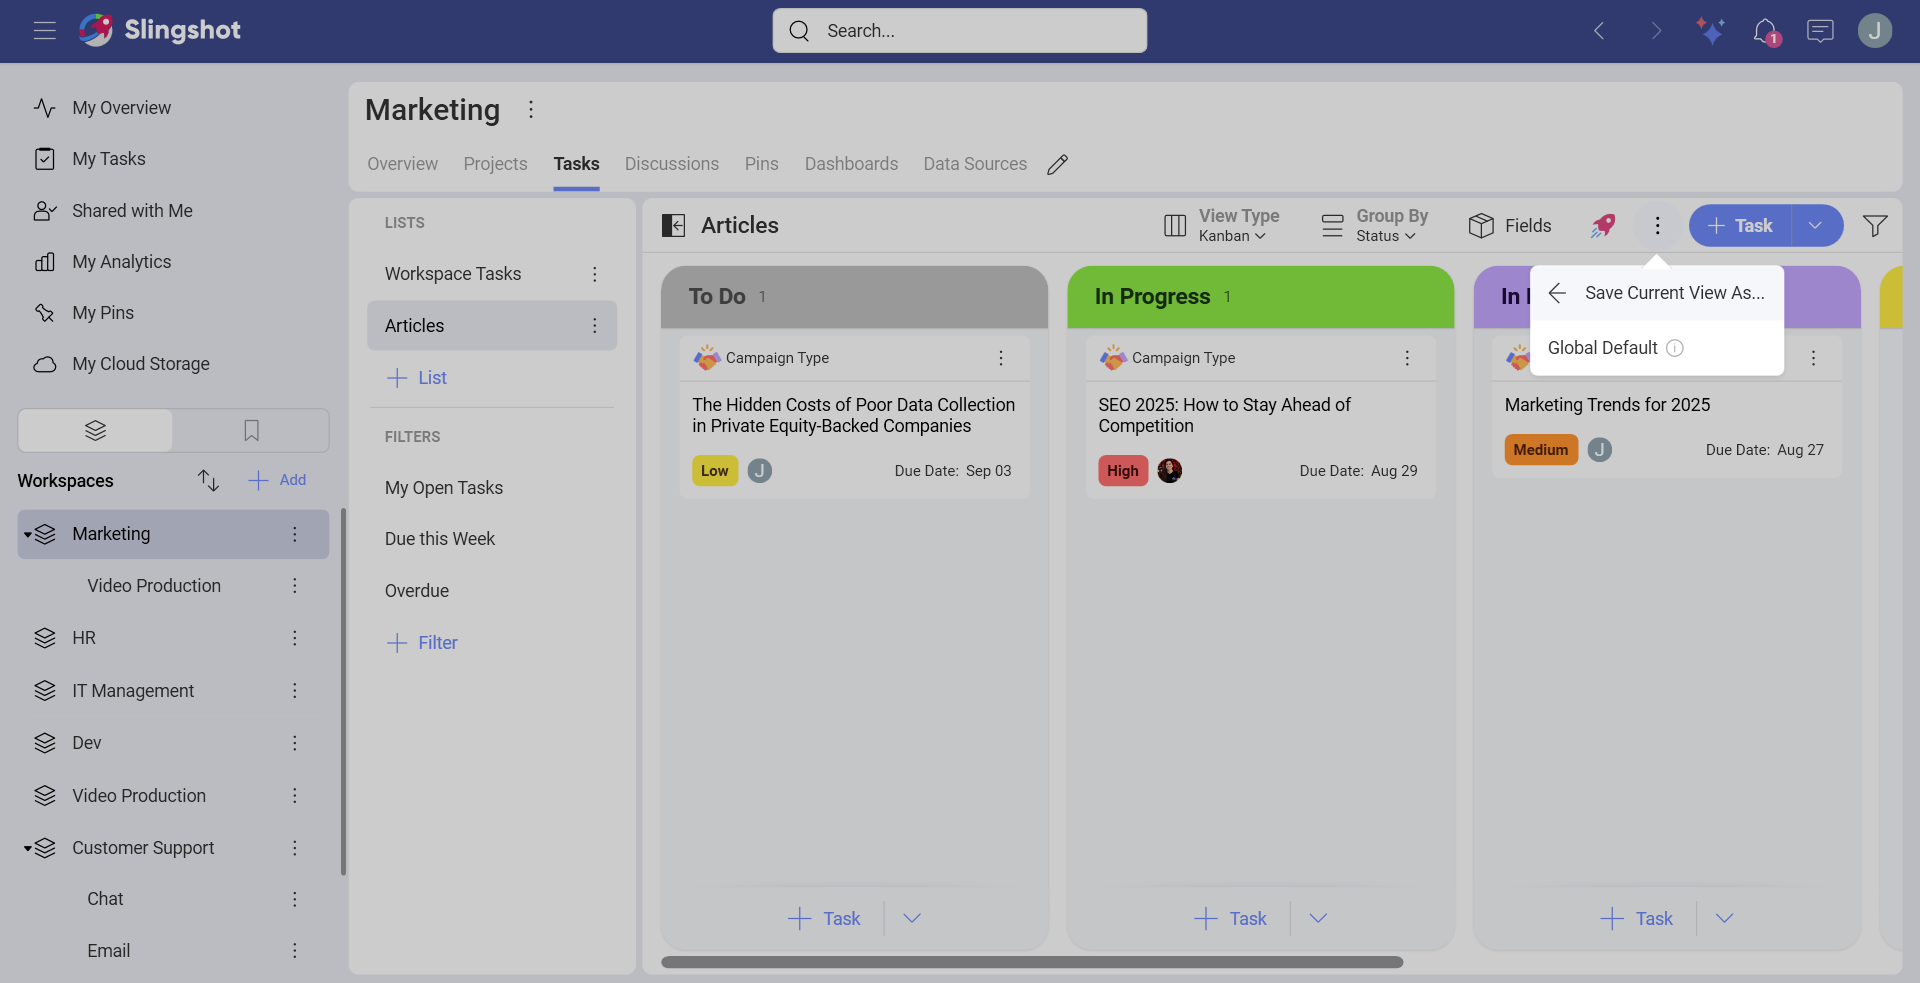
[!NOTE] There can only be one global default view for each task list.
You can always change the global default view by selecting another task view from the list and then giving the steps mentioned above a go.
Default Settings for Global Default View
Besides setting up a global default view for a task list, you can additionally save default settings for the global view.
For example, you can set up the global default view to be Kanban. Then, instead of grouping your tasks by status, you can group them by priority. To save the changes, you will need to:
Open the oveflow menu next to the Productivity Boost button.
Choose Save Current View As....
Click/tap on Default for This View Type.
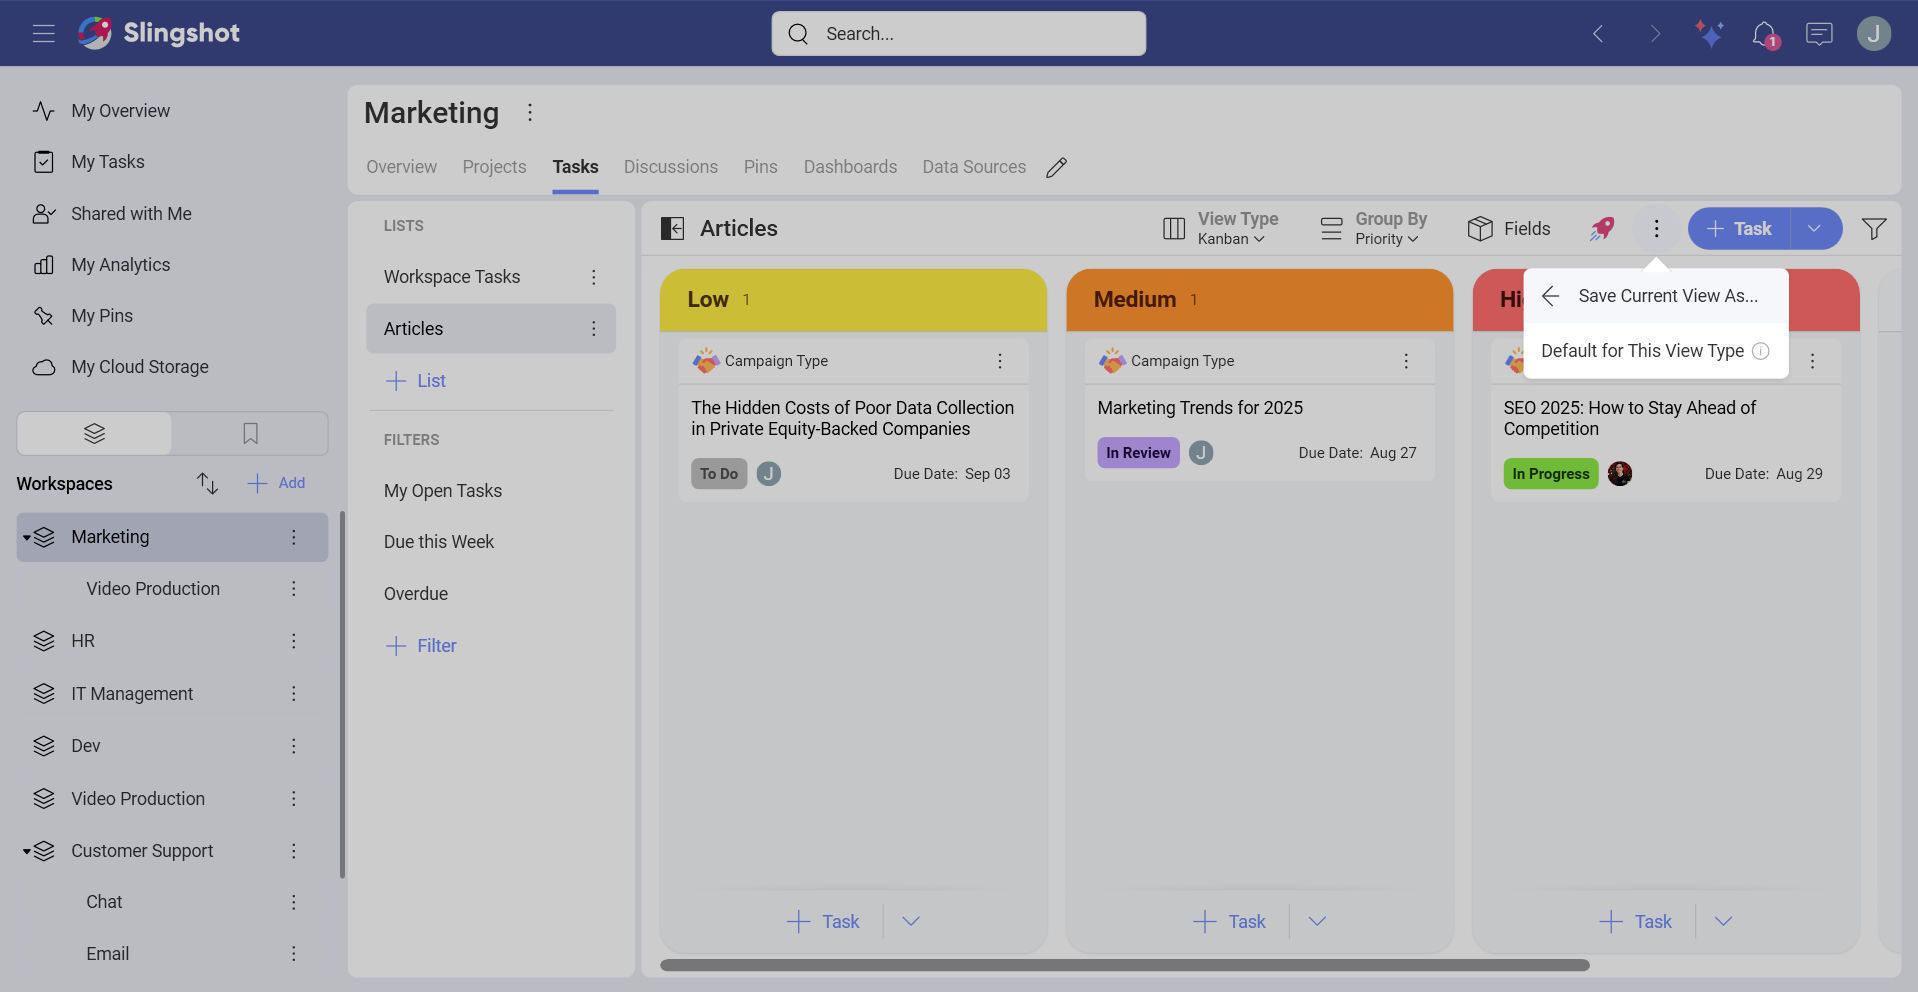
- The changes will be saved for the Kanban view type for that specific task list.
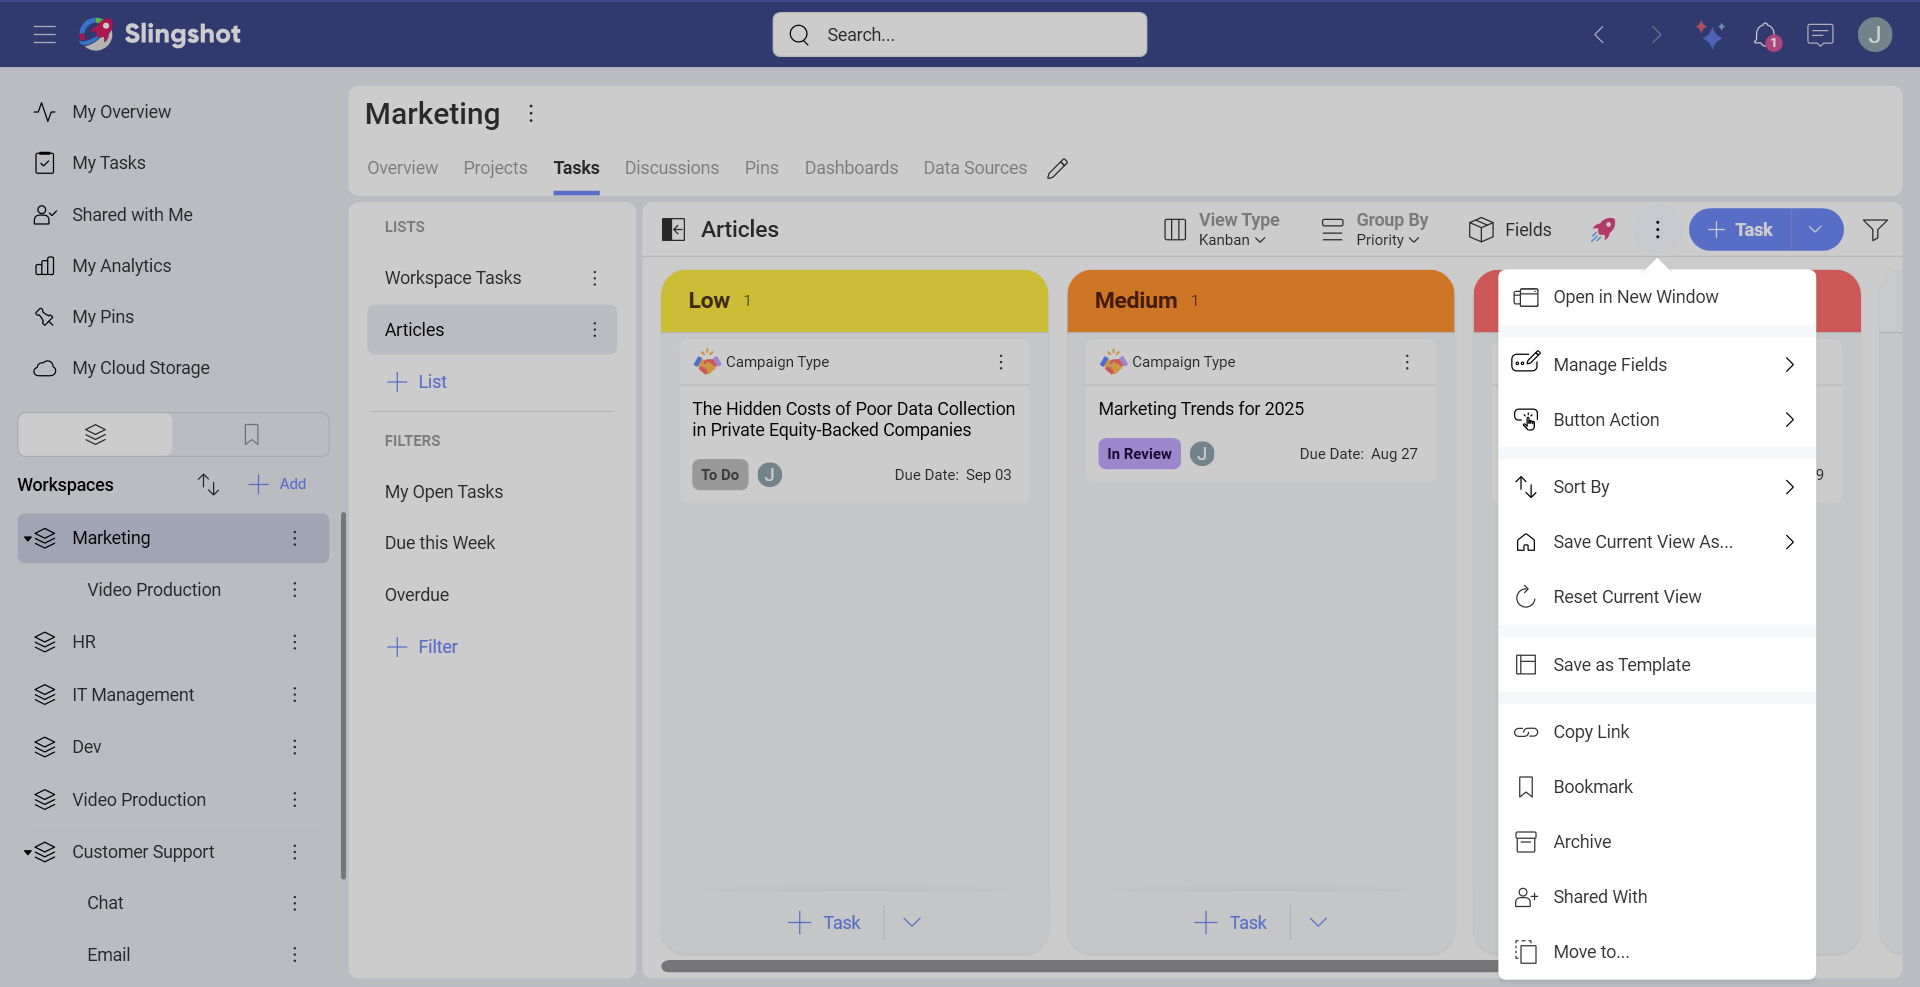
You can always reset the settings of a task view to their original state when you:
Open the oveflow menu next to the Productivity Boost button.
Click/tap on Reset Current View.
Default Settings for Task View Types
You can also set up default settings for a task view that is not the default global view.
To achieve this, you can select a task view and give the steps mentioned above a go.
Task Dependencies
Using the timeline view, you can visualize the dependencies between tasks.
Two or more tasks may depend on each other's completion. Slingshot helps you keep everyone informed about those relationships with task dependencies.
There are two types of dependency:
Waiting On - this means your task can't be started before another task is finished.
Blocking - other tasks can't start before this task is completed.
Task Filters
Using filters allows you to view a set of tasks that meet certain criteria. There are filters out-of-the-box and you can also save filters to use them later.
Out-of-the-box Filters
Slingshot includes several pre-defined filters which are very useful to quickly find specific tasks. These filters can’t be edited or deleted.
Under My Tasks, you can use the Weekly Priorities and Overdue filters.
When you open tasks, that are included in a project or a workspace, you will see:
My Open Tasks – Each task assigned to you within the current workspace or project.
Due this Week – Each task with Due Date set for the current week.
Overdue – Each task whose Due Date expired before today.
Creating Filters
In order to create a new filter, you can:
- Click/tap on +Filter under Filters.
- Add the name of the filter and choose what to include in it.
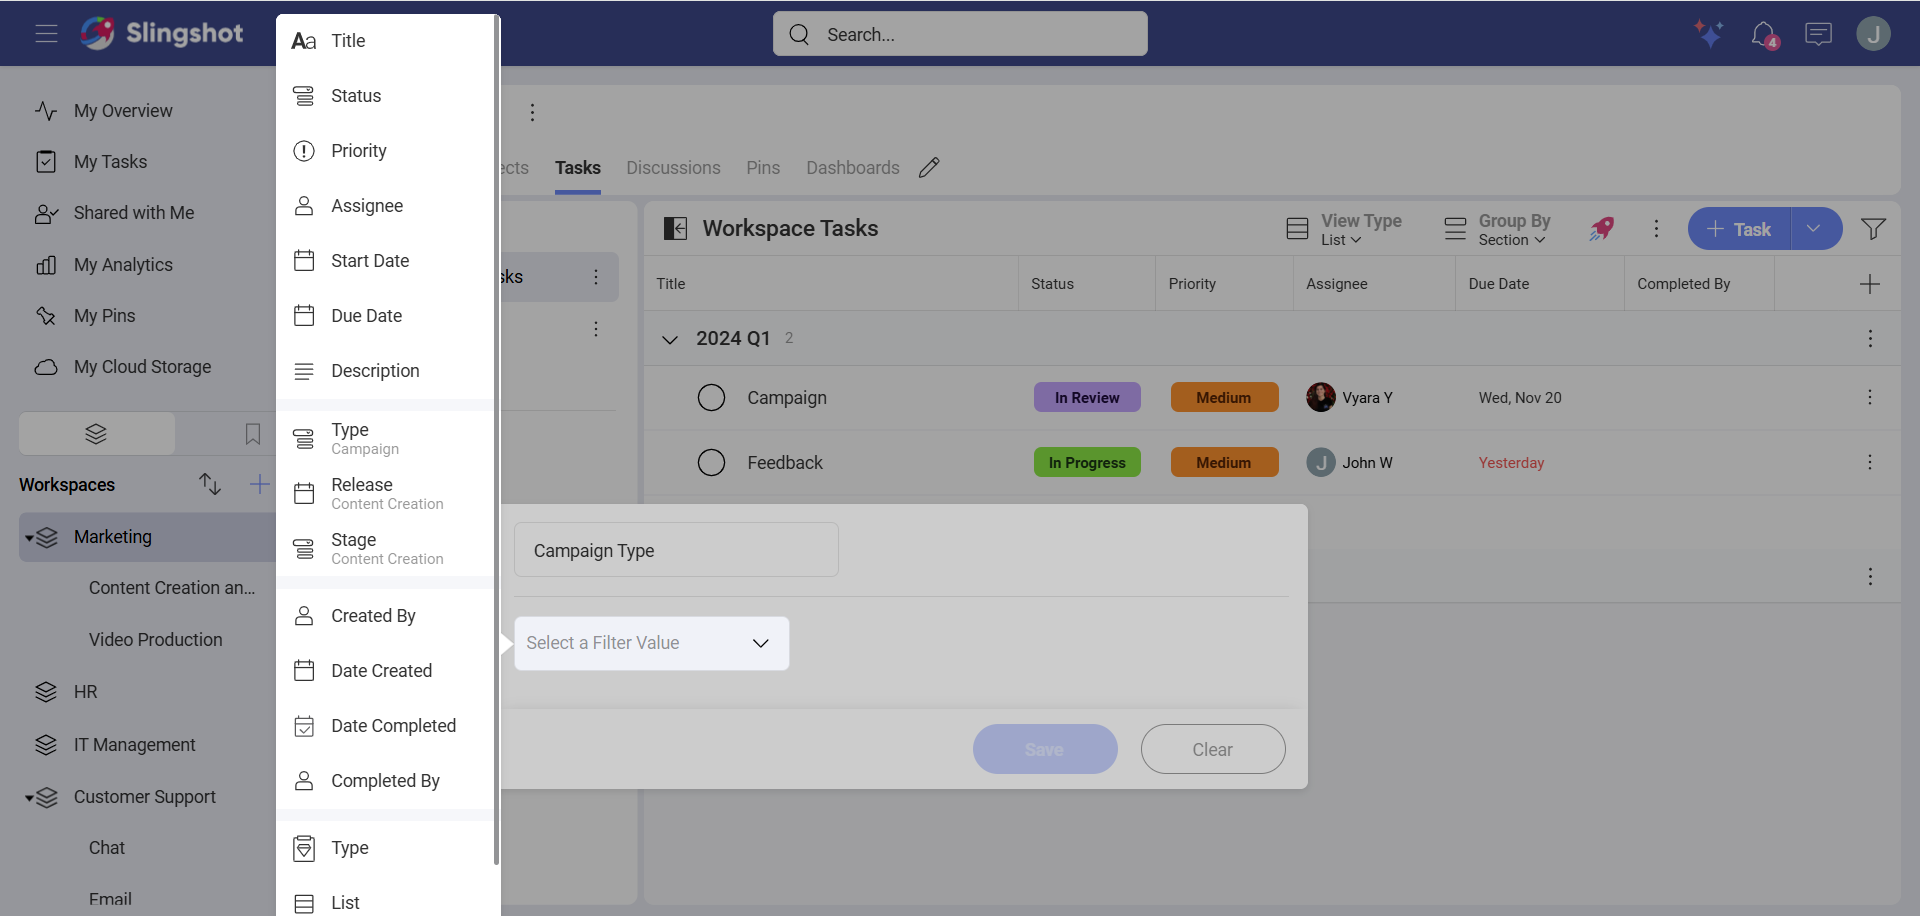
Click/tap on Save.
You will see the new filter in the filters list.
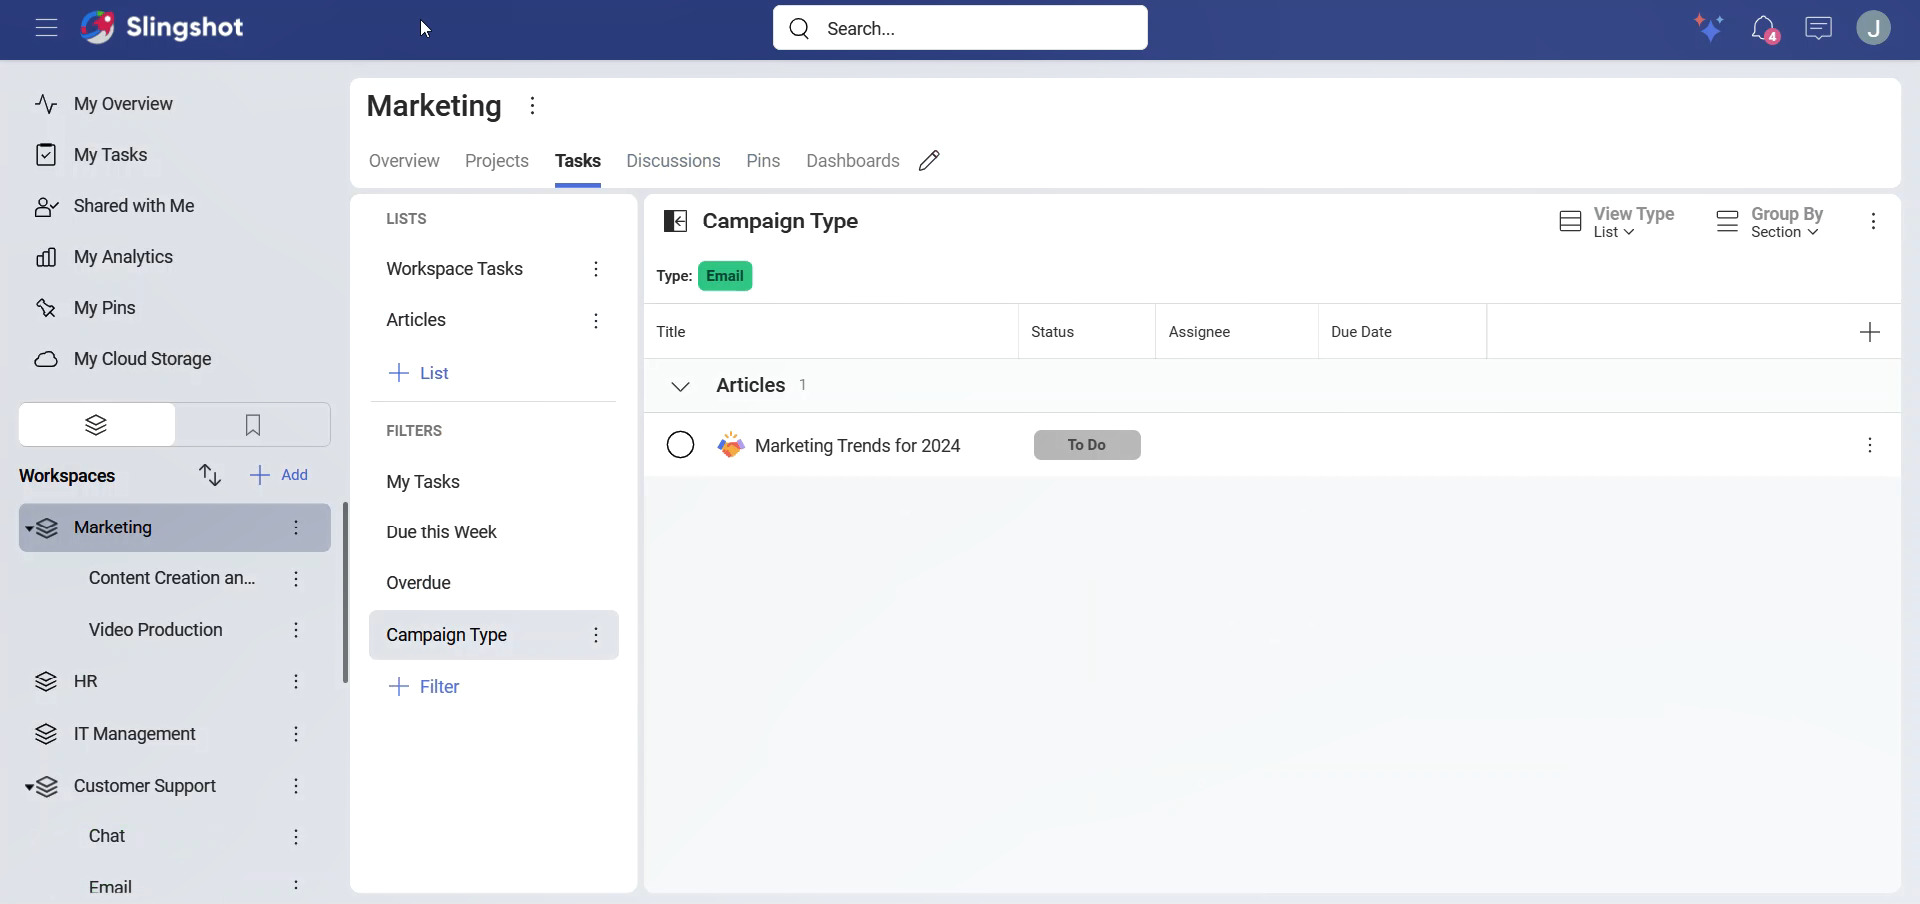
If you want to change the way tasks are being filtered, you can make different adjustments to your filter. For example, if you want to filter only by the status In Progress, you can:
Click/tap on the overflow menu next to the chosen filter.
Choose Edit.
Change the status to In Progress.
Select Save to save your changes.
[!IMPORTANT] Slingshot Tip: For those times that you can't find a specific task, try expanding collapsed panels, removing existing filters, and/or adding filters using the properties of the task you want. Remember that the icon changes to help you identify when you have active filters or not.
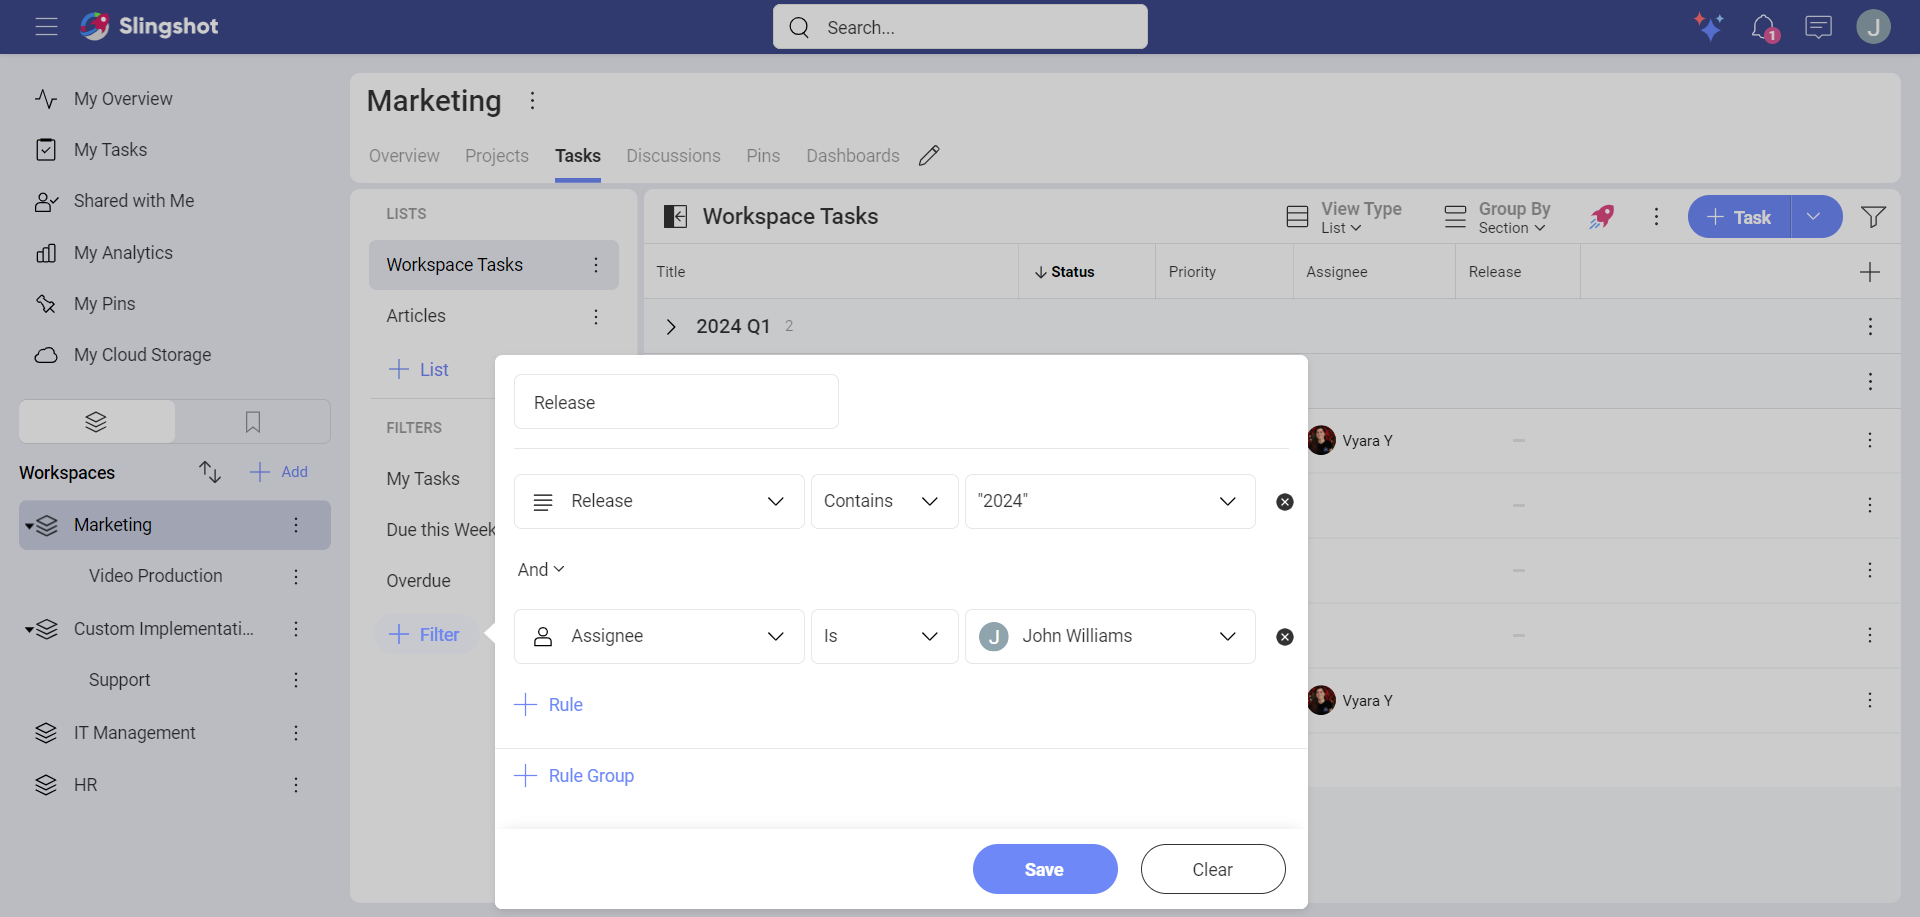
You can also add more rules to the filter from the +Rule button.
For example, we wanted to create a filter that has John Williams’ release tasks for this month. To do that we:
Choose the Release field from the filter options.
Added John Williams as assignee.
Dynamic Me Filter
With the Dynamic Me filter, each user can see the tasks only relevant to them as the filter will adjust to the user viewing it.
For example, you, as a Team Lead, want to have a filter that is used by the entire team to filter out their current tasks for a specific release. You can create a Release task filter with an Assignee set to Dynamic Me. When a team member views this filter, they will see only their tasks for that specific release.
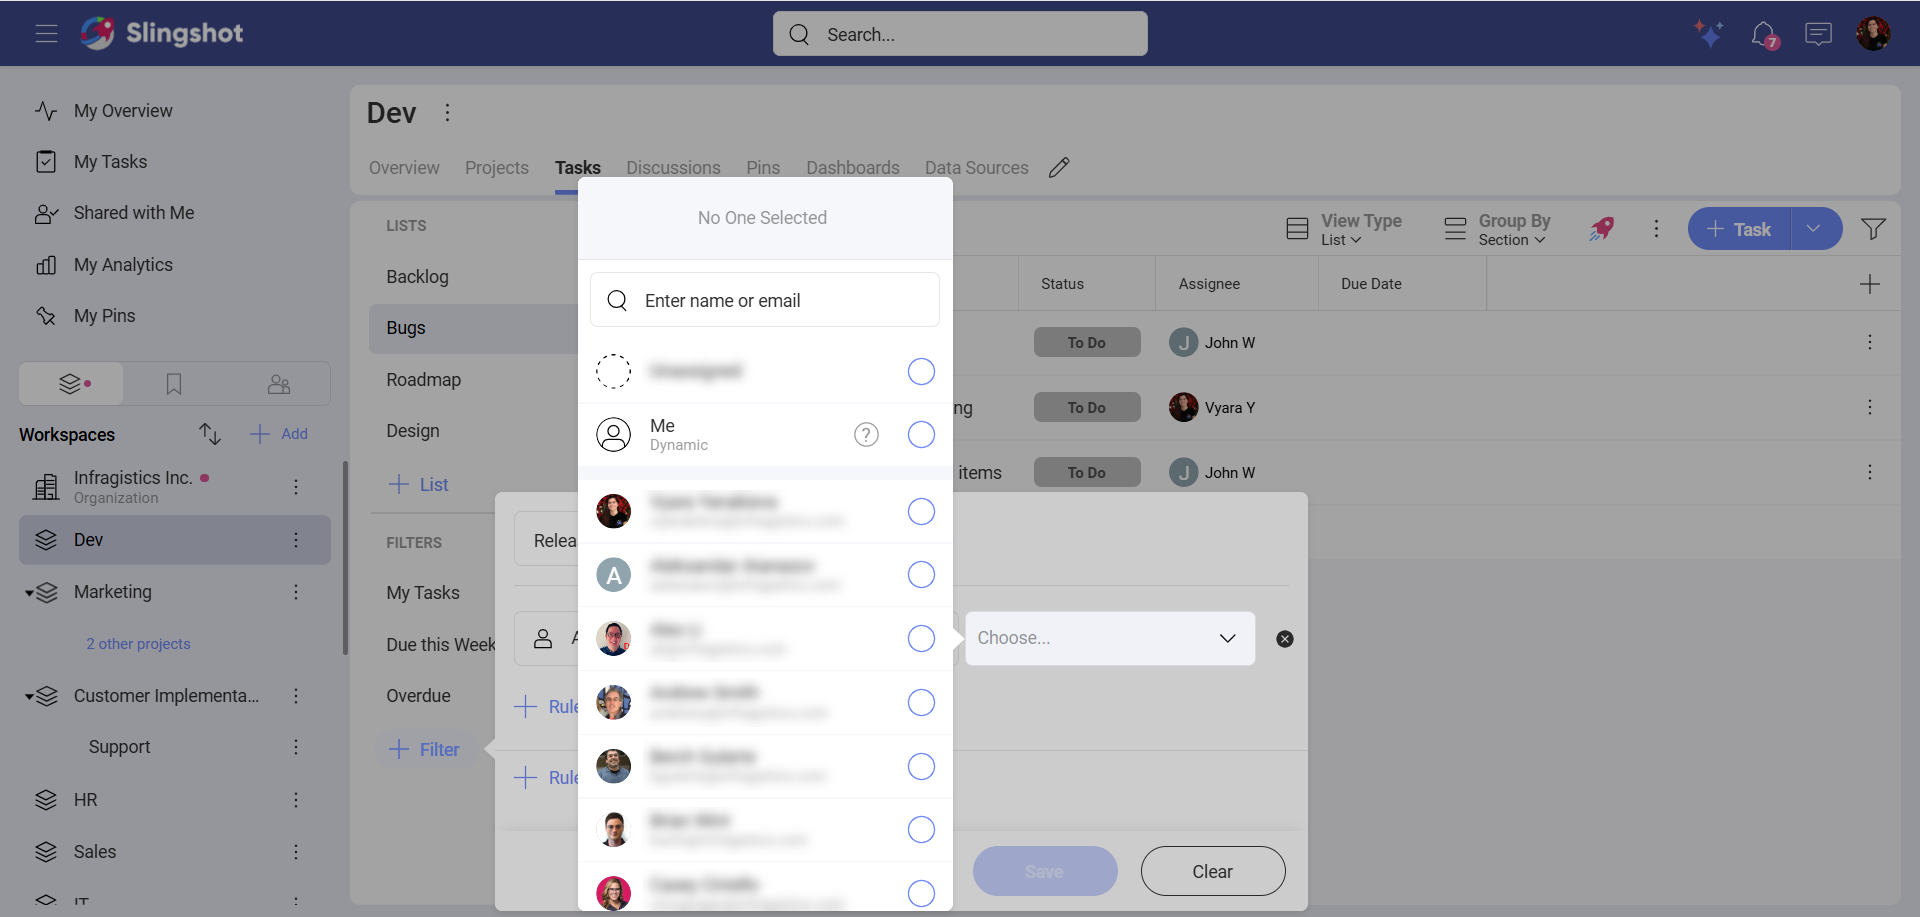
You can use Dynamic Me for the following field values: Assignee, Created By, Completed By, as well as the People custom field.
Note
You can also create a Dynamic Me Filter for Dashboards and Data Sources. You can choose Dynamic Me when you filter by Created By and Modified By.